
CATO Networks API Integration
1. Overview
Cato Networks is a cloud-native Secure Access Service Edge (SASE) platform that converges networking and security into a single, unified service. It provides SD-WAN, secure internet access, zero-trust network access, and advanced threat protection over a global private backbone, simplifying operations and enhancing security and performance for organizations.
2. Vendor configuration
In this configuration, you will set up the Cato Networks API Key and Account ID parameter to access the Cato networks API.
- In the Cato Management Application, only account administrators with the Editor privilege can generate keys. (CMA).
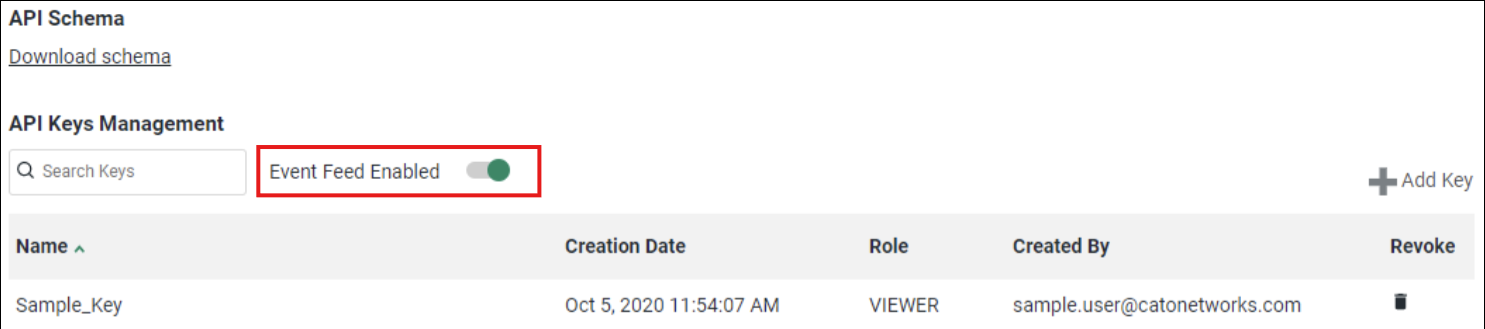
- To ingest security events, you must enable the events feeds on your account. To enable the events feed, follow the steps below:
- In the navigation panel, select System > API Access Management.
- Select Event Feed Enabled. After this, your account starts sending events to the Cato API server.

3. API Key
All access to Cato networks requires an API Key. Follow the below instructions to set up an API Key.
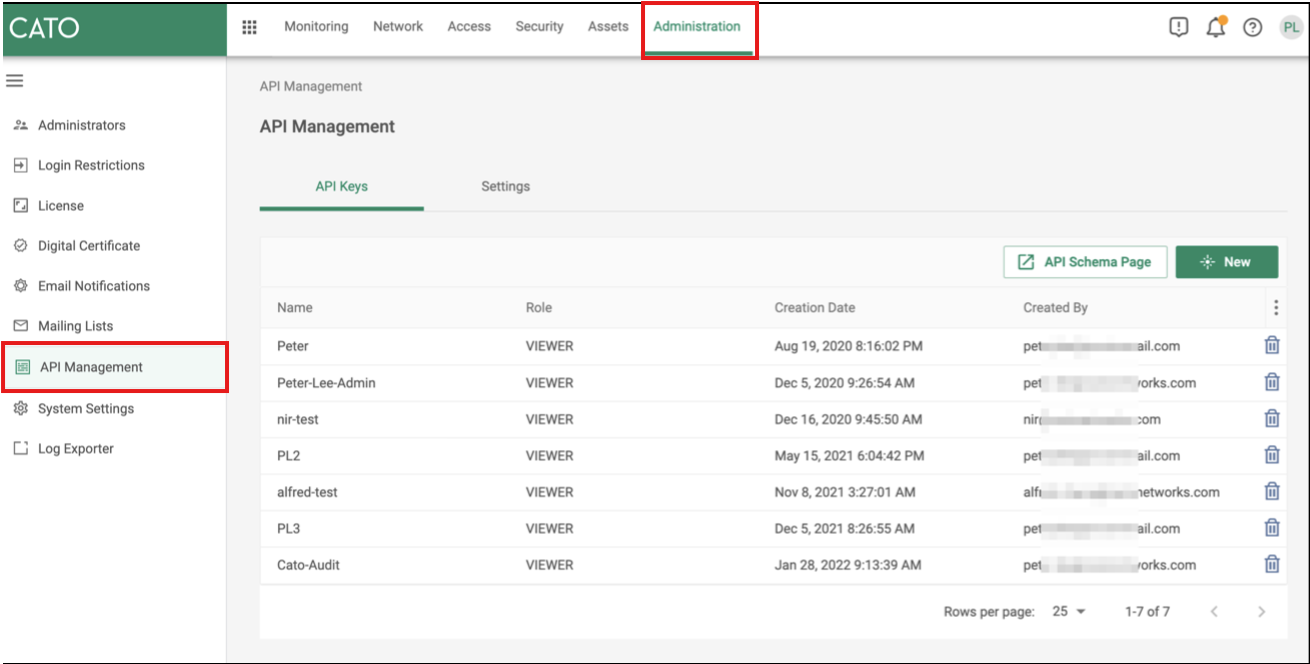
2. On the API Keys tab, click New. The Create API Key panel opens.
3. Enter a Key Name.
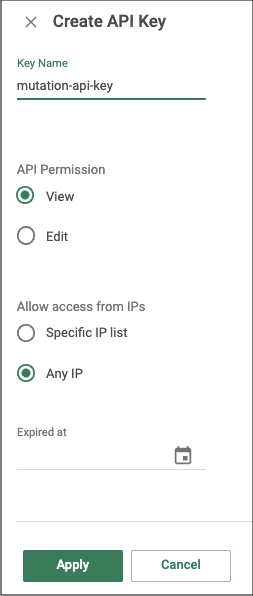
4. Select View in the API Permission.
5. Select Any IP to allow this API key for any IP address under the Allow Access from IPs section.
6. (Optional) Select a date when the API key expires. If you select an expiration date, then you need to update the source configuration with a new API key, or else an unauthorized error will be received.
7. Click Apply. The API key is added, and a pop-up window containing the new API key is displayed.
8. Copy the API Key generated by the Cato Management Application and save it in a secure location.
Note:
The API key value will not be available after closing this window. Kindly ensure that you copy and securely save the API key before closing the window.
9. Click OK to close the pop-up window.
Reference link: https://support.catonetworks.com/hc/en-us/articles/4413280536081-Generating-API-Keys-for-the-Cato-API
4. Build a Collector to Pull Events
Elastic doesn’t natively support Cato, but you can use: Logstash
You need to create a Logstash pipeline. Install Logstash if not already.
Step 1: Install Logstash On Linux (Ubuntu/Debian example)
wget -qO - https://artifacts.elastic.co/GPG-KEY-elasticsearch | sudo apt-key add -
sudo apt-get install apt-transport-https
echo "deb https://artifacts.elastic.co/packages/8.x/apt stable main" | sudo tee /etc/apt/sources.list.d/elastic-8.x.list
sudo apt-get update
sudo apt-get install logstash
Verify installation:
logstash --versionStep 2: Create Logstash Pipeline
2.1: Location
Create file: /etc/logstash/conf.d/cato-pipeline.conf
Pipeline Configuration:
input {
  http_poller {
    urls => {
      cato => {
        method => post
        url => "https://api.catonetworks.com/v1/graphql"
        headers => {
          "x-api-key" => "YOUR_CATO_API_KEY"
          "Content-Type" => "application/json"
        }
        body => '{
          "query": "query { eventsFeed { eventType eventTime eventDetails } }"
        }'
      }
    }
    request_timeout => 60
    schedule => { cron => "* * * * *" }
    codec => "json"
    metadata_target => "http_poller_metadata"
  }
}

filter {
  if [data] {
    mutate {
      replace => { "[events]" => "%{[data][eventsFeed]}" }
    }
    split {
      field => "[events]"
    }

    mutate {
      add_field => {
        "event_type" => "%{[events][eventType]}"
        "event_time" => "%{[events][eventTime]}"
      }
    }

    json {
      source => "[events][eventDetails]"
      target => "event_details"
    }

    date {
      match => [ "event_time", "ISO8601" ]
      target => "@timestamp"
    }

    mutate {
      remove_field => [ "data", "events", "[events][eventDetails]", "http_poller_metadata" ]
    }
  }
}

output {
  elasticsearch {
    hosts => [ "http://localhost:9200" ]
    index => "cato-events-%{+YYYY.MM.dd}"
    user => "elastic"
    password => "your_elastic_password"
  }

  stdout {
    codec => rubydebug
  }
}
Replace:
YOUR_CATO_API_KEYwith your Cato API key- Elastic credentials (user, password, host)
Step 3: Test the Pipeline
Run syntax test:
sudo /usr/share/logstash/bin/logstash --path.settings /etc/logstash -t✅ You should see: Configuration OK
Step 4: Start Logstash
sudo systemctl start logstash
sudo systemctl enable logstash
Check logs:
sudo journalctl -u logstash -fStep 5: Verify Data in Kibana
- Open Kibana: http://<your-server>:5601
- Log in
- Go to: Stack Management → Data Views → Create data view
- Name:
-
cato-events-* - Save
Then go to Discover, select the new data view, and explore your Cato event logs!
No Comments