
AQUILA - Setup Integration from Auth0
Auth0 Integration Guide
Integrate Auth0 to ingest identity-related logs such as login attempts, user authentications, MFA usage, and blocked requests to support identity threat detection and correlation.
Credentials & API Access Setup (Auth0)
Before setting up the integration, create a Machine-to-Machine application in Auth0 to collect logs via API.
Steps:
-
Log in to Auth0 Dashboard
-
Go to https://auth0.com
-
-
Create a Machine-to-Machine Application
-
Navigate to Applications → Applications
-
Click Create Application
-
Enter a name
-
Choose the type: Machine to Machine
-
-
Click Create
-
-
Authorize the Auth0 Management API
- When prompted, select Auth0 Management API
- Grant the required scopes depending on the data you want to collect:
-
Login Activity:
read:logs,read:users -
MFA Logs:
read:logs -
Failed Logins:
read:logs -
User Access Logs:
read:logs,read:users
-
- Click Authorize
-
Get the Required Credentials
-
Go to Applications → Applications
-
Select your created app
-
Go to the Settings tab
- Copy the following values:
- Client ID: Used for authentication
- Client Secret: Used with Client ID for API access
- Auth0 Domain: Your tenant domain (e.g., your-tenant.us.auth0.com)
- Base URL: Your Auth0 API base URL (e.g., https://your-tenant.us.auth0.com) — same as Domain but with https:// prefix)
-
- These values will be entered into the integration form required on Aquila
Permissions Reference (Auth0 M2M App)
Ensure the app is granted the following scopes from the Auth0 Management API:
| Data Stream | Scopes Required | Why Needed |
|---|---|---|
| Login Activity | read:logs, read:users |
View login records and user info |
| MFA Logs | read:logs |
Pull logs related to MFA events |
| Failed Logins | read:logs |
Detect login failure events |
| User Access Logs | read:logs, read:users |
Track user sessions & activity |
Aquila Integration Configuration
AQUILA – Auth0 Integration
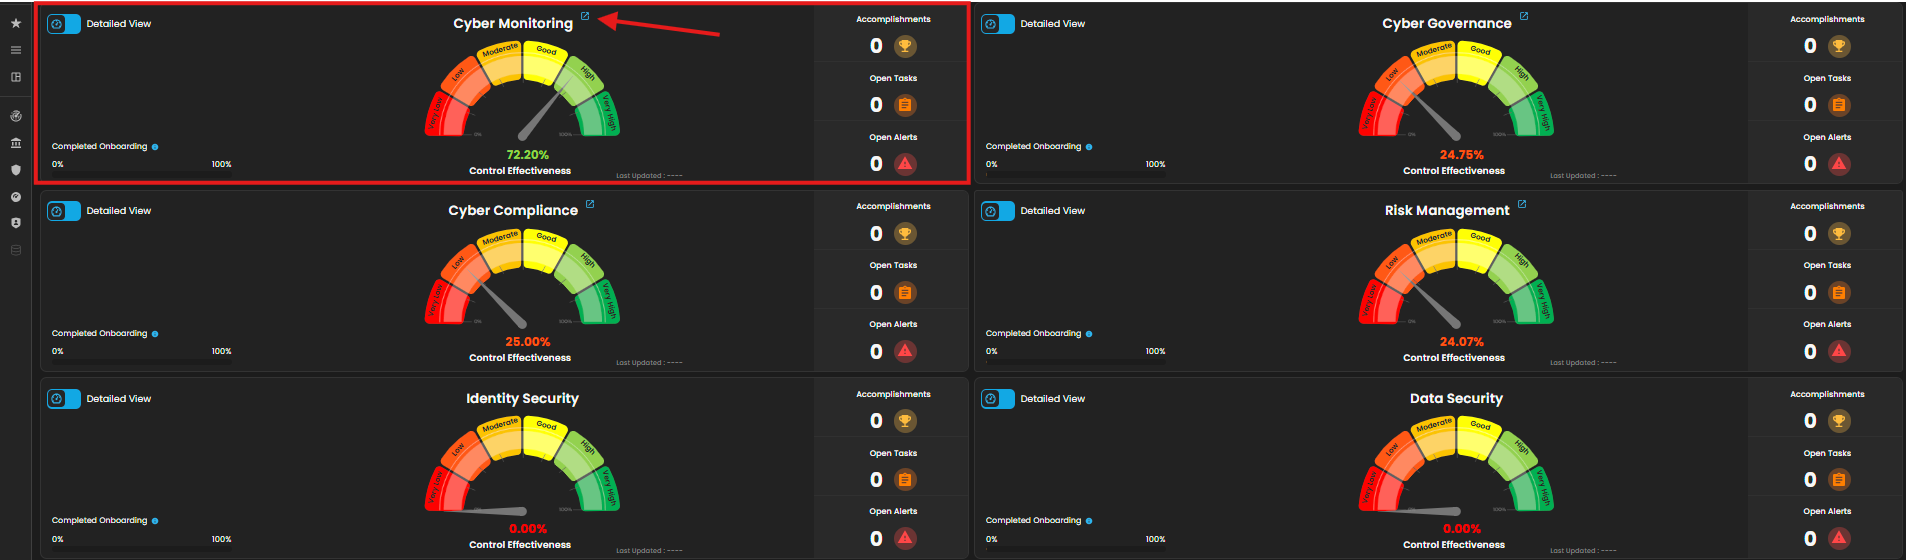
1. Log in to AQUILA click here - CyTech - AQUILA. Choose Cyber Monitoring and click the small arrow icon to redirect you to the Cyber Monitoring Dashboard.
2. In the dashboard, choose Cyber Incident Management (SIEM and XDR).


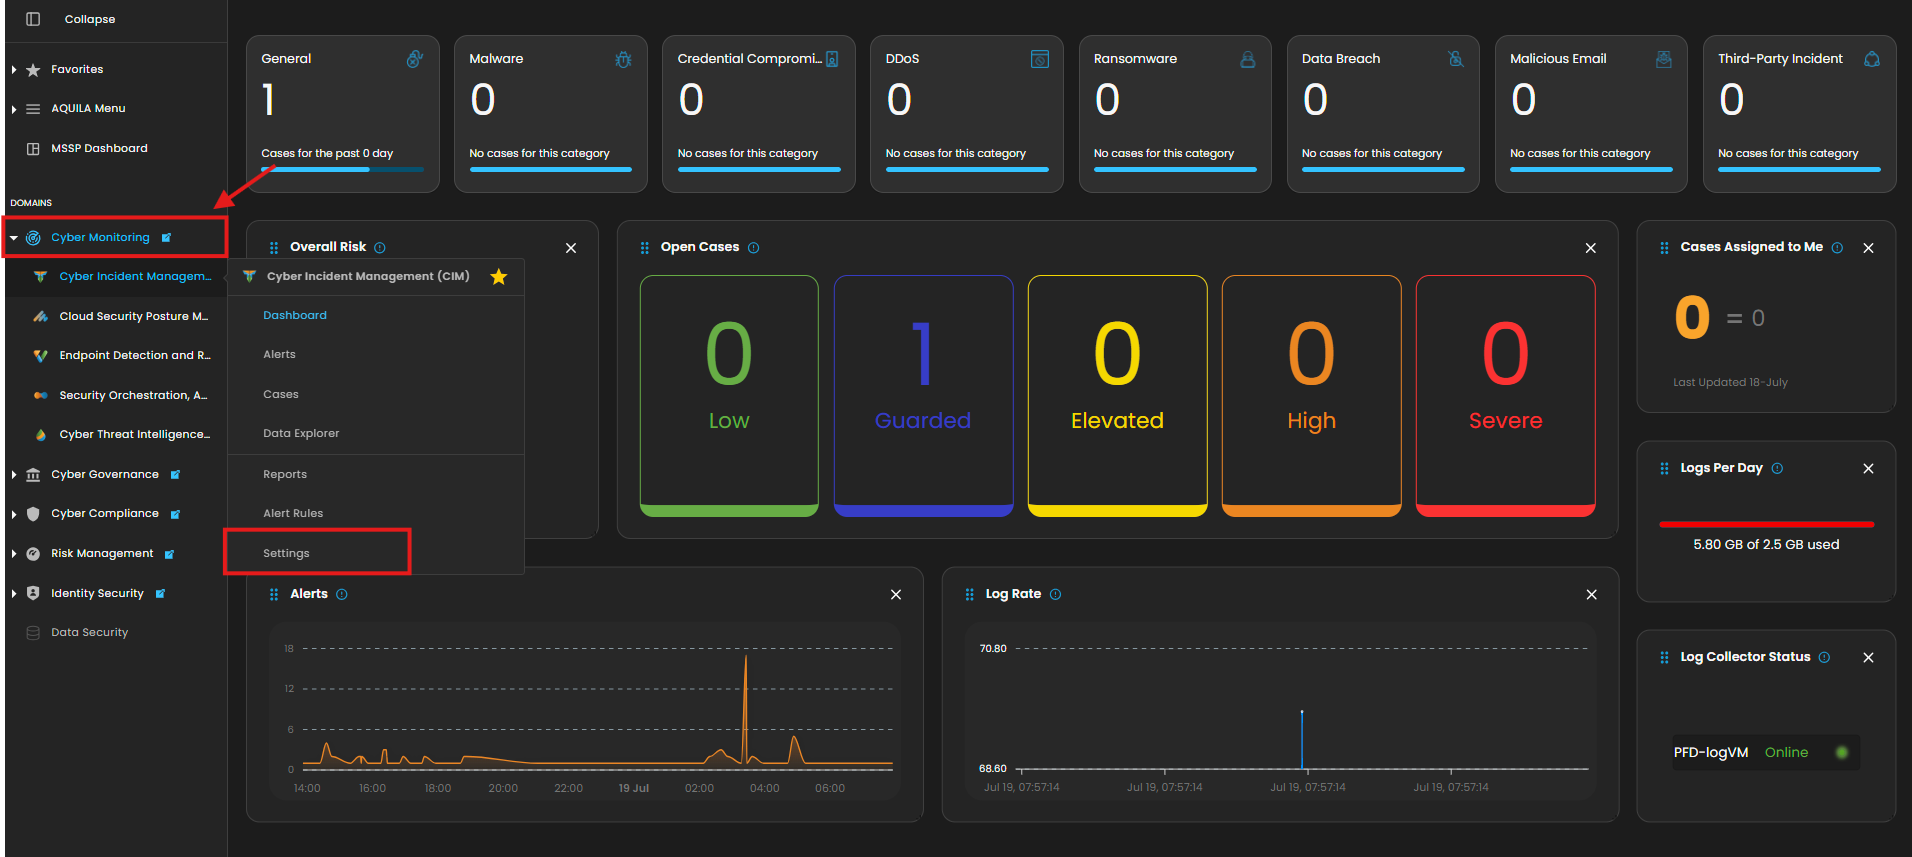
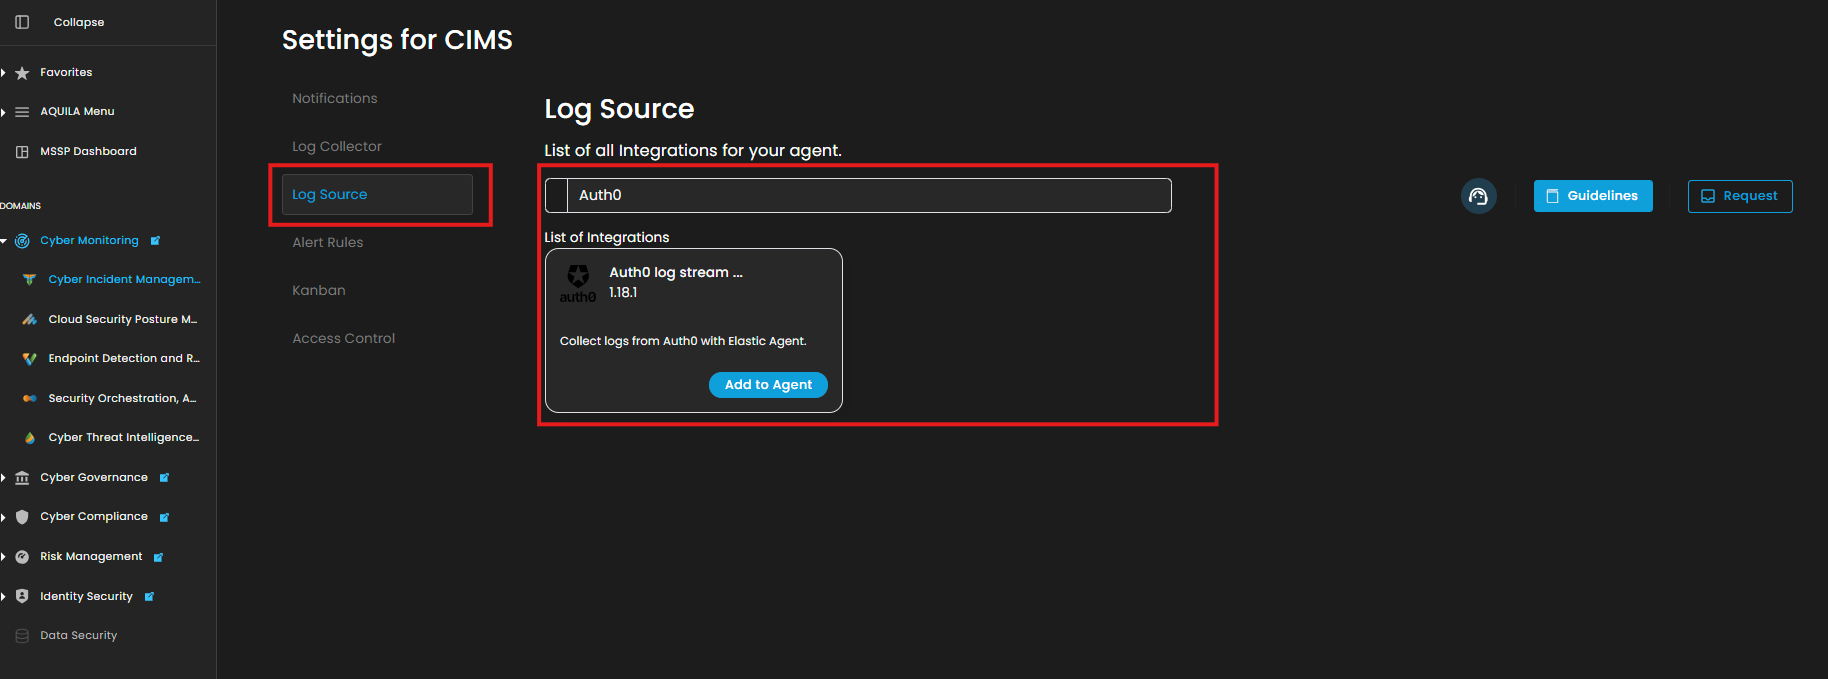
5. Click the "Settings and Navigate through Settings>Log Source>Search Bar (Search the Source to Add)>Add to Agent.
6. Choose your Log Collector. (If you not yet installed your Log Collector please refer to this link - Log Collector Installation.)

7. In the integration settings follow the instructions given below.
- Click the drop arrow to display the contents needed for the integration setup.
- Choose the Integration between via Webhooks or API requests.
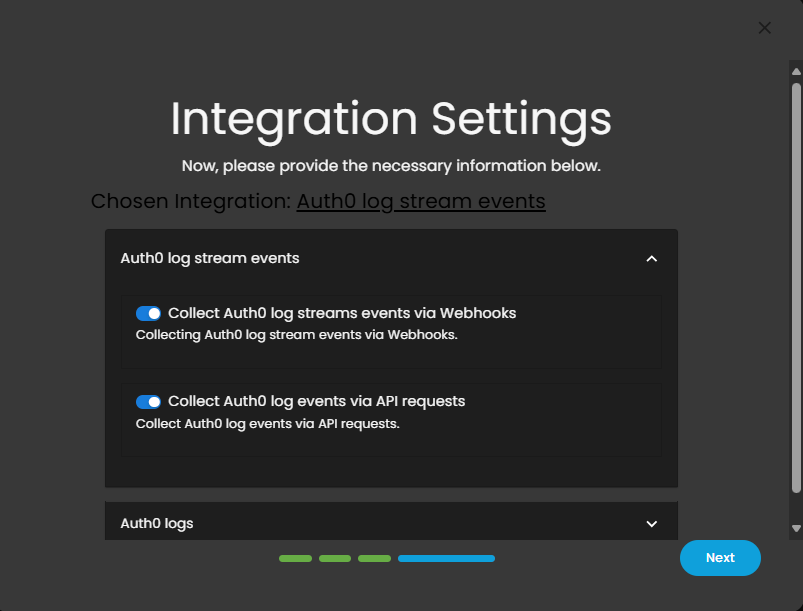
- Scroll down and go to the Auth0 Logs section.
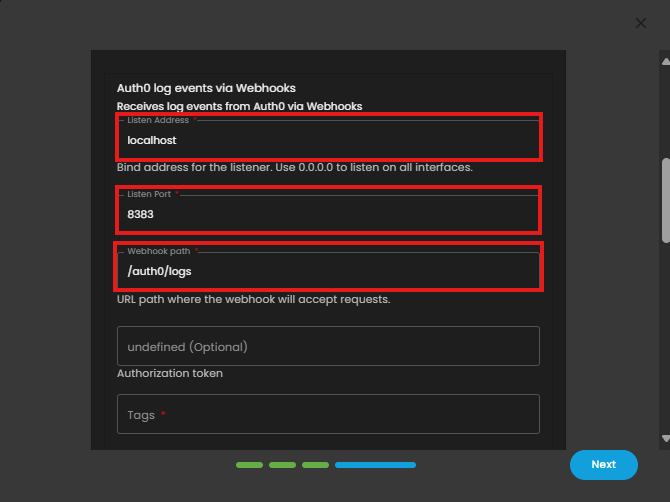
- This one is for Log Events via Webhooks. Enter the required fields Local Address, Listen Port, and Webhook Path
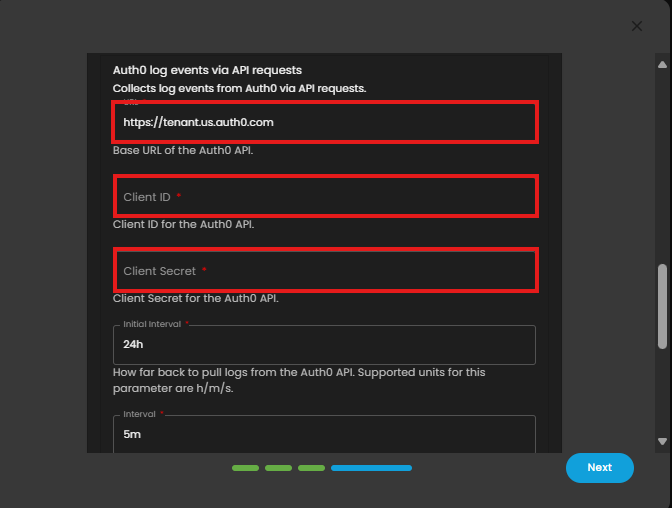
- This one is for Log Events via API Requests. Input the credentials: Base URL, Client ID and the Client Secret Value.
- Finally, click Next to install the log source integration.
8. Wait for the Successful window to display, this will confirm the successful integration.

If you need further assistance, kindly contact our support at support@cytechint.com for prompt assistance and guidance.
No Comments