
AQUILA EDR - MacOS Issues
Overview
To properly install and configure Elastic Defend manually without a Mobile Device Management (MDM) profile, there are additional permissions that must be enabled on the host before Elastic Endpoint—the installed component that performs Elastic Defend’s threat monitoring and prevention is fully functional:
- Approve the system extension
- Approve network content filtering
- Enable Full Disk Access
1. Approve the system extension for Elastic Endpoint
On macOS Monterey (12.x), the Elastic Endpoint loads a system extension during installation. This extension is essential for monitoring system events such as process activity, file system changes, and network traffic.
The following message appears during installation:
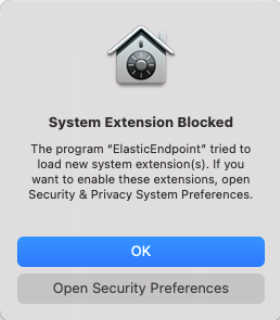
- Click Open Security Preferences.
-
In the lower-left corner of the Security & Privacy pane, click the Lock button, then enter your credentials to authenticate.
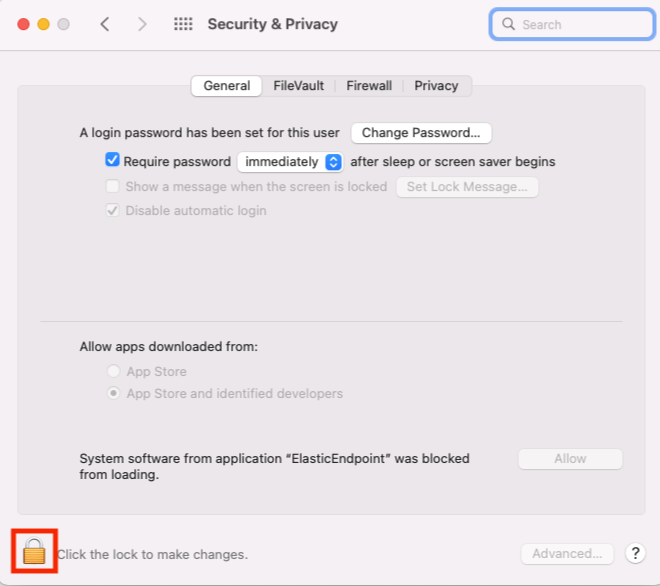
3. Click Allow to allow the Elastic Endpoint system extension to load.

2. Approve network content filtering for Elastic Endpoint
After successfully loading the Elastic Endpoint system extension, an additional message appears, asking to allow Elastic Endpoint to filter network content.
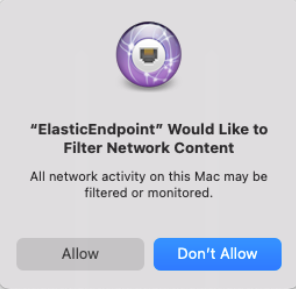
- Click Allow to enable content filtering for the Elastic Endpoint system extension. Without this approval, Elastic Endpoint cannot receive network events and, therefore, cannot enable network-related features such as host Isolation.
3. Enable Full Disk Access for Elastic Endpoint
Elastic Endpoint requires Full Disk Access to subscribe to system events via the Elastic Defend framework and to protect your network from malware and other cybersecurity threats. To enable Full Disk Access on endpoints running macOS Catalina (10.15) and later, you must manually approve Elastic Endpoint.
Note: The following instructions apply only to Elastic Endpoint running version 8.0.0 and later. To see Full Disk Access requirements for the Endgame sensor, refer to Endgame’s documentation.
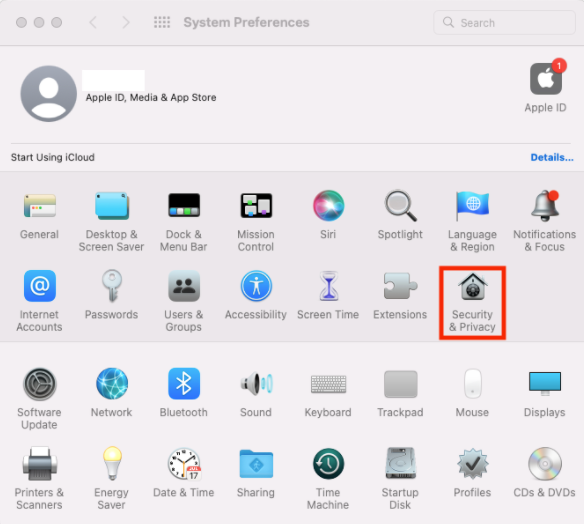
- Open the System Preferences application.
- Select Security and Privacy.
- On the Security and Privacy pane, select the Privacy tab.
- From the left pane, select Full Disk Access.
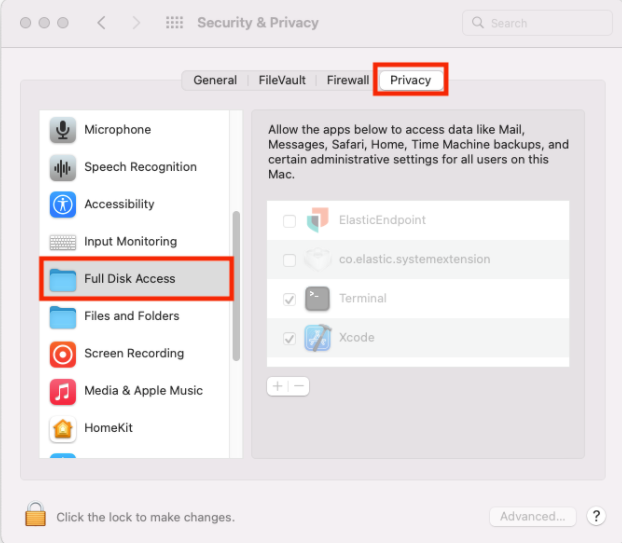
- In the lower-left corner of the pane, click the Lock button, then enter your credentials to authenticate.
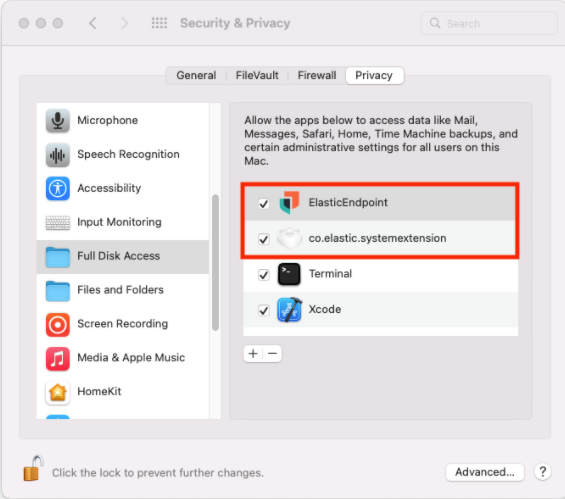
-
In the Privacy tab, confirm that
ElasticEndpointANDco.elastic.systemextentionare selected to properly enable Full Disk Access.
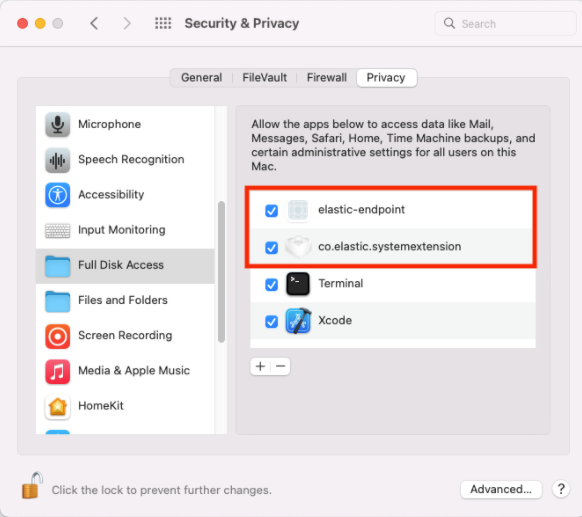
If the endpoint is running Elastic Endpoint version 7.17.0 or earlier:
- In the lower-left corner of the pane, click the Lock button, then enter your credentials to authenticate.
- Click the + button to view Finder.
- Navigate to
/Library/Elastic/Endpoint, then select theelastic-endpoint file. - Click Open.
- In the Privacy tab, confirm that
elastic-endpointANDco.elastic.systemextensionare selected to properly enable Full Disk Access.
4. Restart your EDR
- Open Terminal.
- Restart your EDR by using the following commands
sudo launchctl kickstart -k system/com.elastic.elastic-agent
References: https://www.elastic.co/guide/en/security/8.18/deploy-elastic-endpoint.html#system-extension-endpoint
If you need further assistance, kindly contact our support at support@cytechint.com for prompt assistance and guidance.
No Comments