
Microsoft 365 DLP Integration and Monitoring
Summary of Actions Required:
Register an app in Microsoft Entra ID and configure API permissions for Microsoft Graph and Office 365 Management APIs. Grant admin consent and collect credentials (Application ID, Tenant ID, Client Secret). Ensure Unified Audit Logging is enabled in Microsoft 365.
Prerequisites:
-
Global Admin access
-
Microsoft 365 E5 or Compliance add-on licenses
-
Required roles: Compliance Administrator, Security Reader, Global Reader, or a custom role with DLP alert access
DLP Alerts:
-
Go to Microsoft Purview Portal > Data Loss Prevention > Alerts
-
Ensure DLP policies are set to generate alerts
Step 1: Microsoft Entra ID - App Registration
Register Your Application in Microsoft Entra ID:
-
-
Log in to your Azure Account, click here - Azure Portal Link.
-
Navigate to Azure Active Directory > App registrations.
-
Click New Registration.
-
Provide a Name for the application, we can suggest "CyTechAQUILA-Monitoring".
-
Click Register.
-
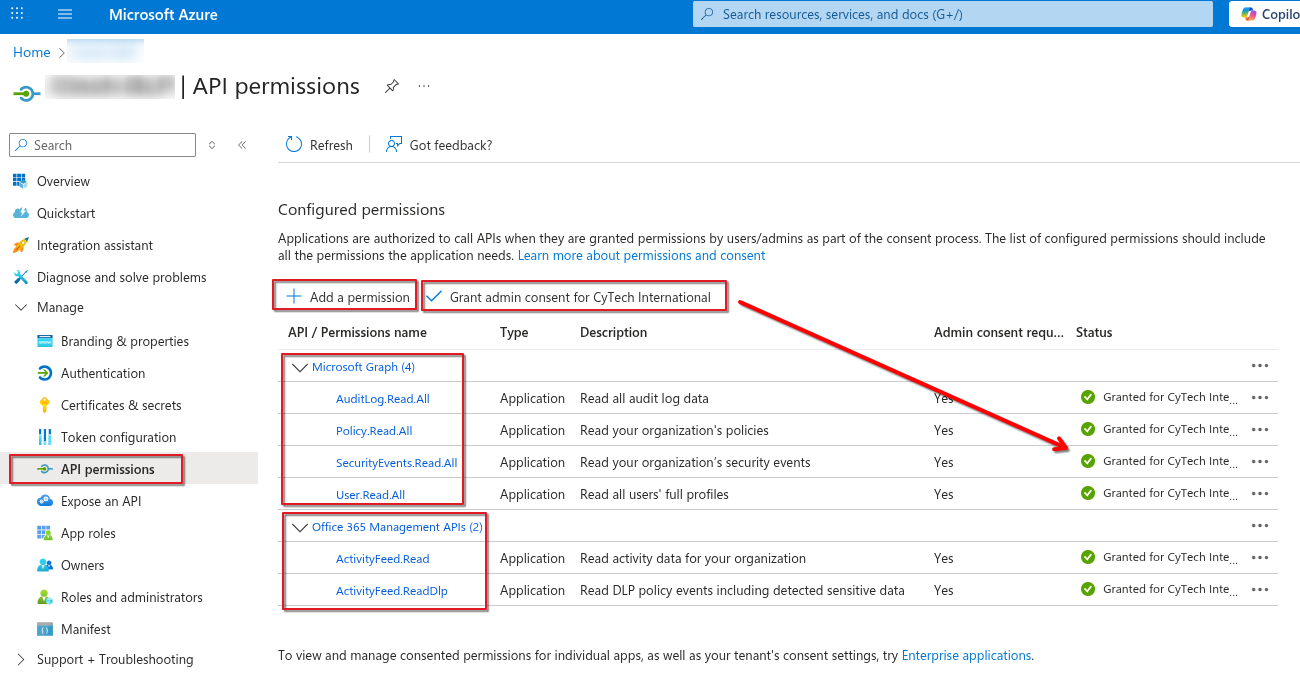
Step 2: API Permissions
Microsoft Graph API Permissions:
Office 365 Management API Permissions:
-
- Search for Office 365 Management APIs and add the required permissions.
-
In Application Permissions, look for permissions.
-
Under ActivityFeed select: ActivityFeed.Read and ActivityFeed.ReadDLP to read DLP policy events.
Grant Admin Consent:
-
-
In API Permissions, click Grant admin consent for <tenant name>.
-
Confirm the action.
-
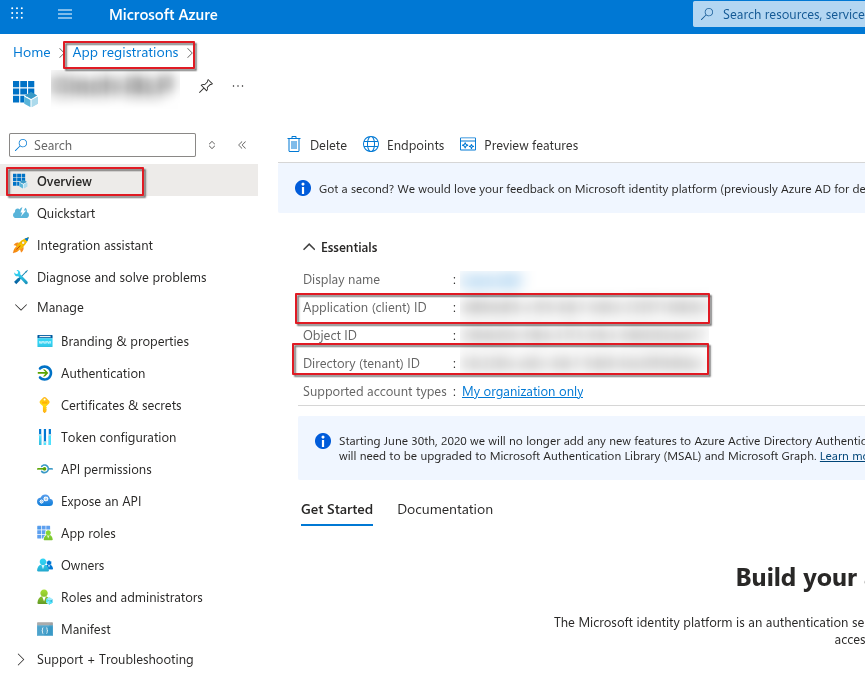
Step 3: Integration Requirements for Office 365
Application (Client) ID:
-
-
Go to App registrations > Select your application.
-
Copy the Application (client) ID from the overview page.
-
Directory (Tenant) ID:
-
-
In the Azure Portal, navigate to Azure Active Directory > Overview.
-
Copy the Directory (tenant) ID.
-
Create New Client Secret (Value):
-
-
In App registrations > Select your application, go to Certificates & secrets.
-
Click New client secret.
-
Add a description and expiration period, then click Add.
-
Copy the Value (displayed only once).
-

Step 4: Verify Unified Audit Logging is Enabled
Unified Audit Logging must be enabled before accessing data via the Office 365 Management Activity API.
Method 1: Using Microsoft 365 Security & Compliance Center
-
Sign in to Microsoft 365:
-
Go to https://admin.microsoft.com and sign in with your Global Admin credentials.
-
-
Access the Security & Compliance Center:
-
In the left-hand menu, under Admin centers, click on Security (or go directly to https://security.microsoft.com).
-
-
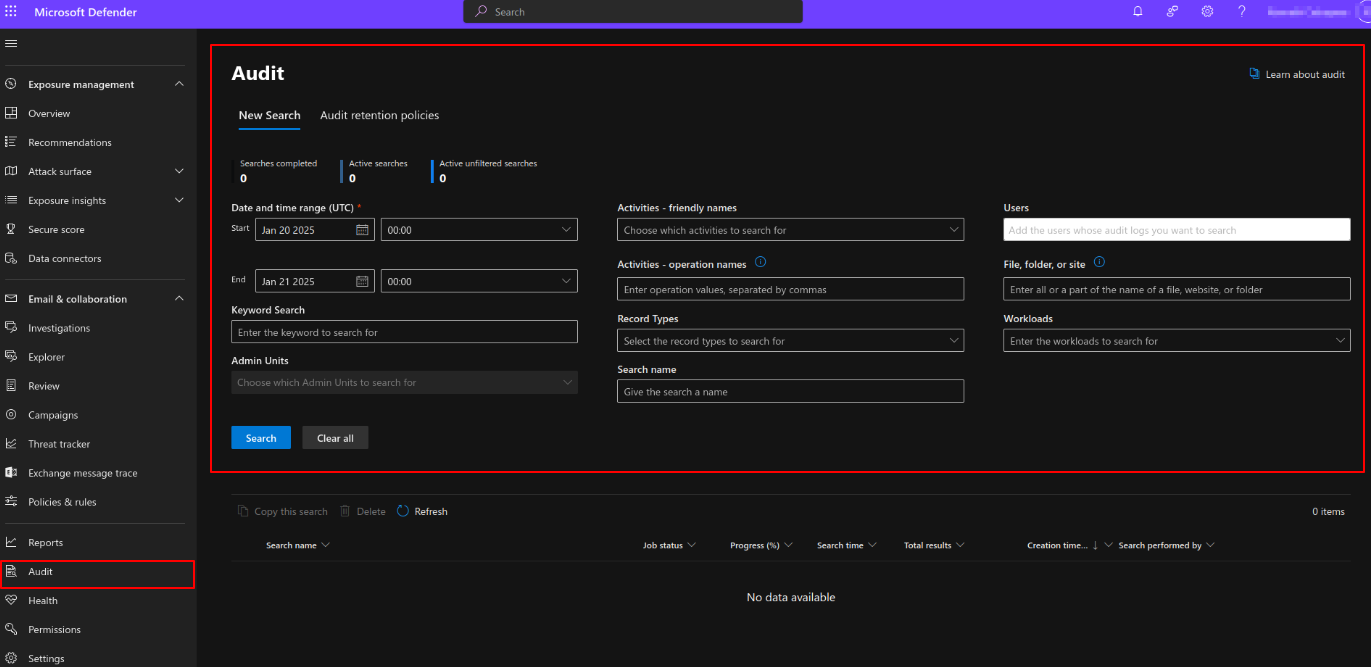
Navigate to Audit Log Search:
-
In the Security & Compliance Center, go to Search in the left-hand menu and click on Audit log search.
-
-
Check Audit Log Status:
-
If you see an option to search the audit log, then audit logging is already enabled.
- If you see a banner that says "Start recording user and admin activity" or a prompt to enable auditing, it means that audit logging is not yet enabled.
-
-
Enable Audit Logging:
-
If audit logging is not enabled, you can click on the prompt to enable it. This will enable auditing for all activities within your Microsoft 365 environment. The process may take a few hours to be fully operational.
-
If you need further assistance, kindly contact our support at support@cytechint.com for prompt assistance and guidance.