
AQUILA - Salesforce Integration
Overview
The Salesforce integration enables you to monitor your Salesforce instance. Salesforce is a customer relationship management (CRM) platform that supports businesses in managing marketing, sales, commerce, service, and IT teams from a unified platform accessible from anywhere
Make sure API Enabled permission is selected for the user profile in your Salesforce instance:1. Go toSetup>Quick Findand typeUsers.2. SelectUsersfrom the left navigation tree.3. In theFull Namecolumn, select the name associated with the user account used for data collection4. Search for theAPI Enabledpermission on the profile page. If it’s not present, search underSystem Permissionsand check if the API Enabled privilege is selected. If not, enable it for data collection.Make sure that collecting data using Real-Time Event Monitoring API (external, opens in a new tab or window) is enabled:1. Go toSetup>Quick Findand typeEvent Manager2. SelectEvent Managerfrom the left navigation tree3. To monitor an event, for example, Login Event, or Logout Event, click the dropdown arrow and selectEnable Storage.4. Check if you have the required permissions:View Real-Time Event Monitoring Data.
Configuration
To configure the Salesforce integration, you need the following information:
-
Salesforce instance URL
-
Client key and client secret for authentication
-
Username
-
Password
-
Token URL
-
API version
1. Salesforce instance URL: URL
This is the URL of your Salesforce Organization.
-
Salesforce Classic: Given the example URL https://na9.salesforce.com/home/home.jsp, the Salesforce Instance URL is extracted as
-
Salesforce Lightning: The instance URL is available under your user name in the View Profile tab. Use the correct instance URL in case of Salesforce Lightning because it uses *.lightning.force.com but the instance URL is *.salesforce.com.
Ensure the Instance URL is noted, as it will be used in both API creation and integration steps.
2.Client Key and Client key and client secretSecret for authenticationAuthentication
To use this integration, you need to create a new Salesforce Application using OAuth. Follow these steps to create a connected application in Salesforce:
-
Log in to Salesforce with the user credentials you want to collect data with.
-
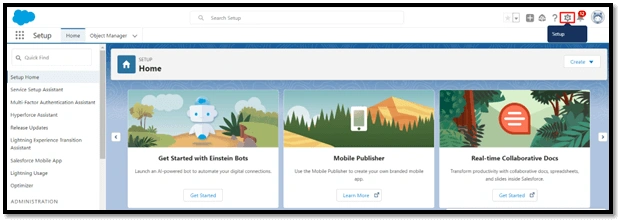
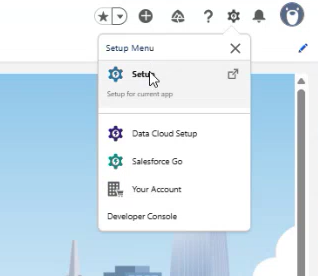
Click Setup in the top right menu bar.

-
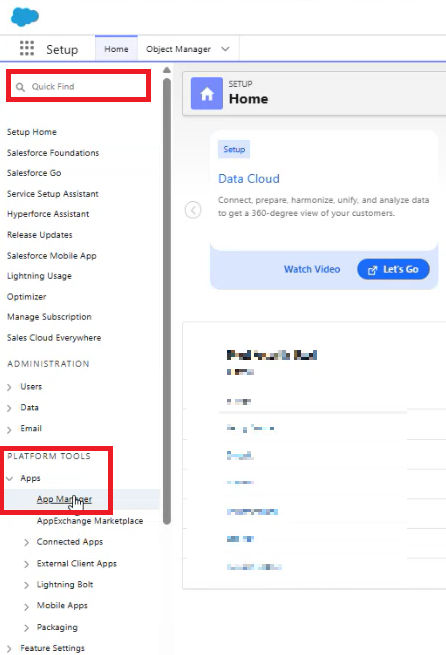
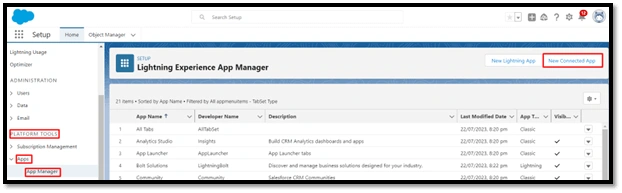
In the
SearchQuickSetupFindboxtextbox, search for App Manager or you can scroll down to PLATFORM TOOLS and selectit.App Manager.
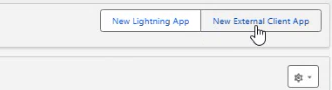
ClickIn the upper right corner, choose the New
ConnectedExternalApp,Client App.andfill
-
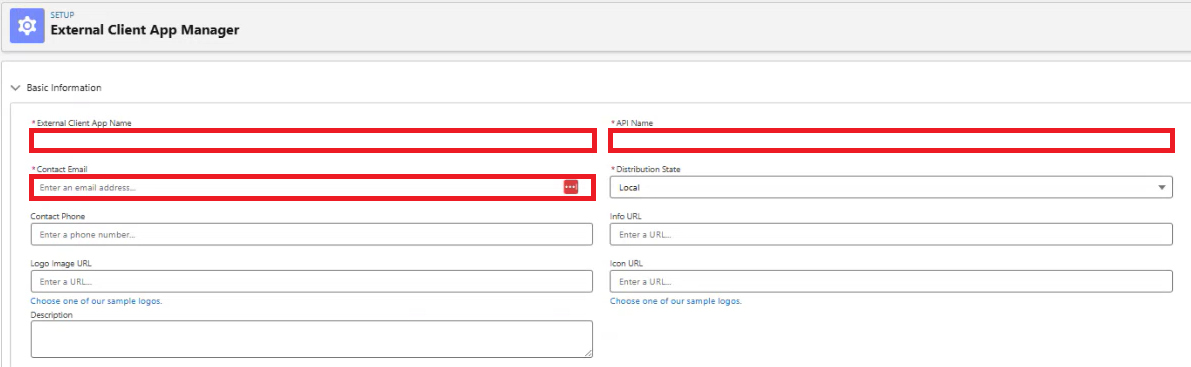
Provide a name for the connected application. This name will be displayed in the
details:App Manager and on its App Launcher tile. -
Enter the API name. The default is a version of the name without spaces. Only letters, numbers, and underscores are allowed. If the original app name contains any other characters, edit the default name.
-
Enter the contact email for Salesforce.

-
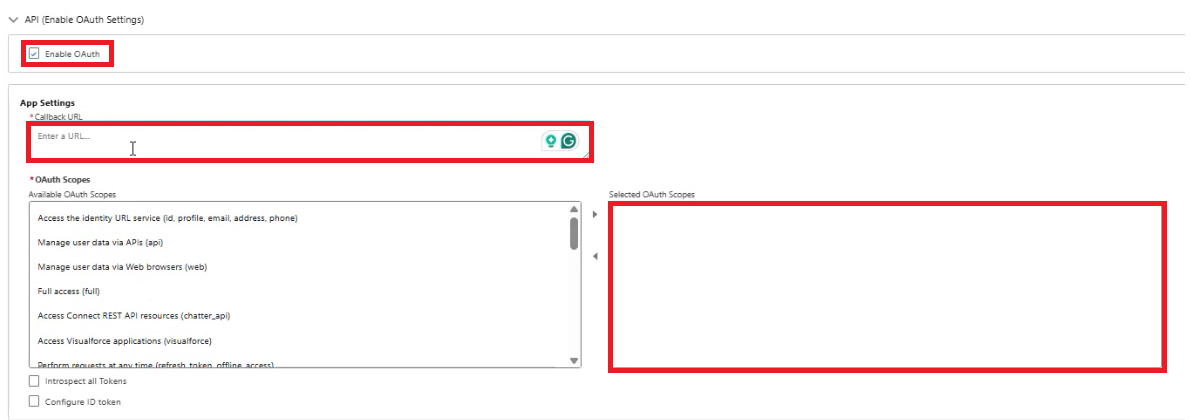
Under the API (Enable OAuth Settings) section, check the box for Enable OAuth Settings.
-
In the Callback URL field, enter the instance URL as specified in Salesforce instance
URLURL. Example URL: https://na9.salesforce.com -
Select the following OAuth scopes to apply to the connected app:
-
Manage user data via APIs (api)
-
Perform requests at any time (refresh_token, offline_access)
-
(Optional) If you encounter any permission issues during data collection, add the Full access (full) scope.
-
-
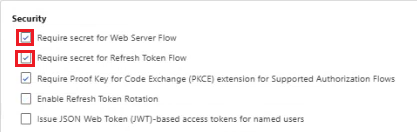
Select Require Secret for the Web Server Flow to require the app's client secret in exchange for an access token.
-
Select Require Secret for Refresh Token Flow to require the app's client secret in the authorization request of a refresh token and hybrid refresh token flow.
-
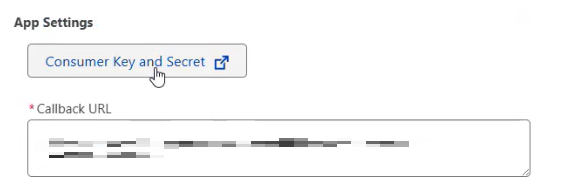
thenThen
selectscroll up above theManageCallback URL on the App Settings you will see the ConsumerDetailsKey and Secretunderbutton,APIclickdetails.it.
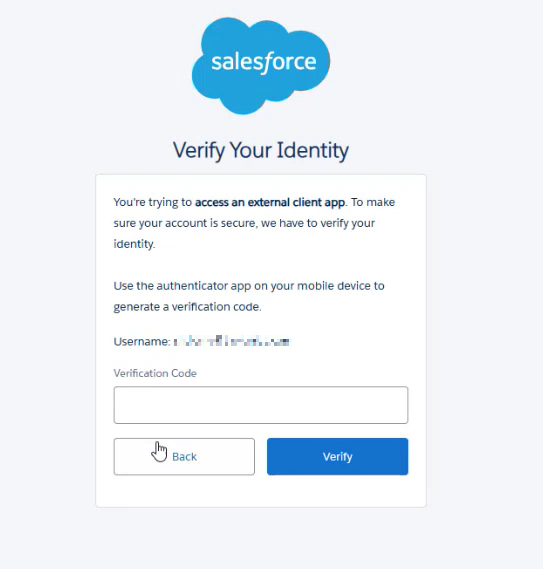
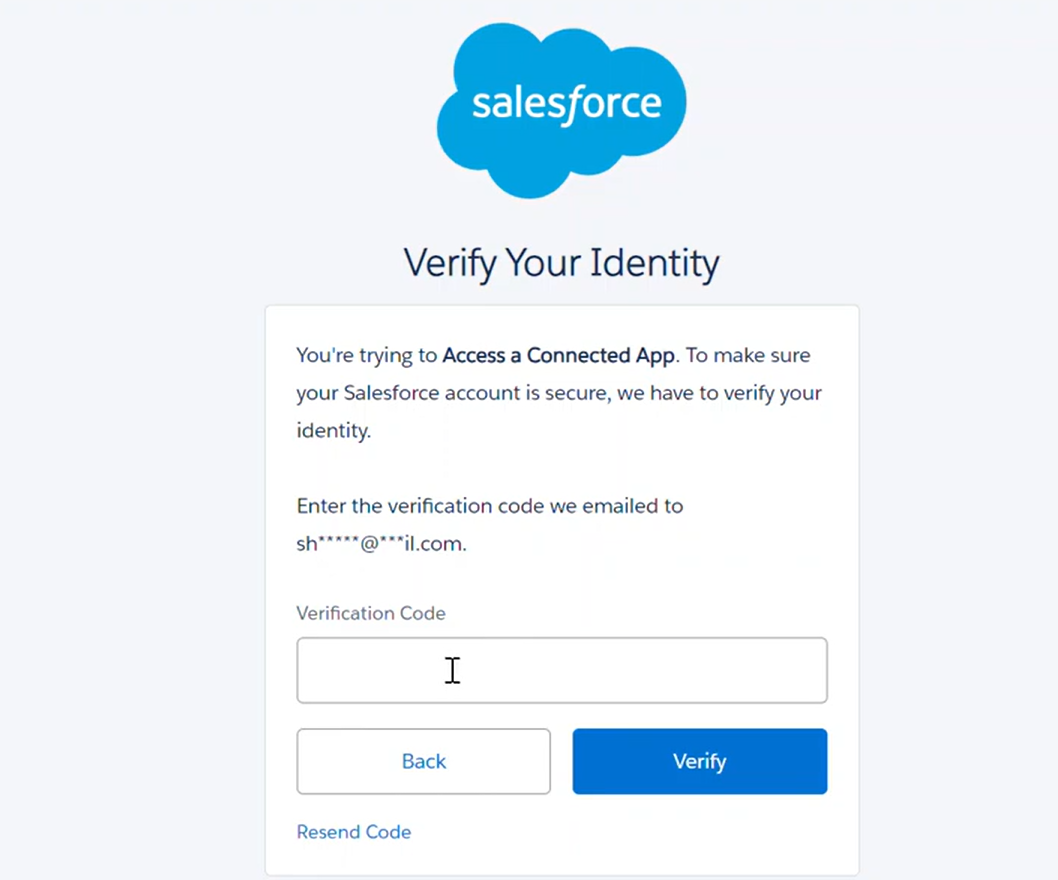
-
It will create another tab. Verify the user account by entering the Verification Code.
-
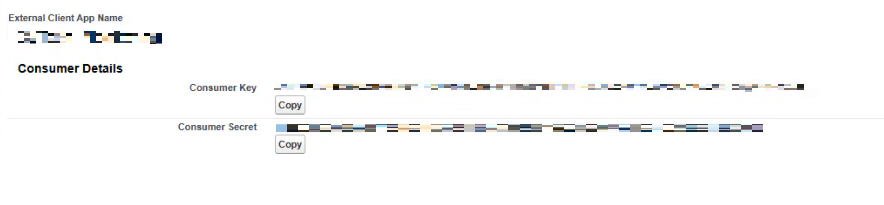
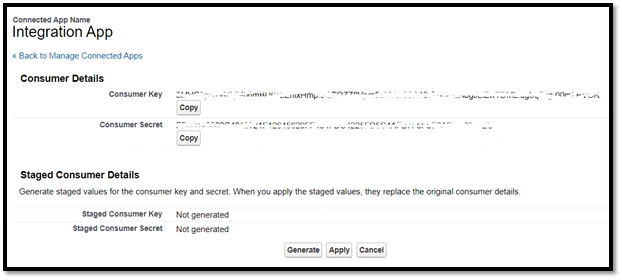
Copy the
Consumer KeyandConsumer Secretfrom the Consumer Details section. These values should be used as the Client ID and Client Secret, respectively, in theconfiguration.integration.
-
Close that tab and go back to the External Client App Manager. Click Save.
It may take approximately 10 minutes for the changes to take effect. Then ClickContinue.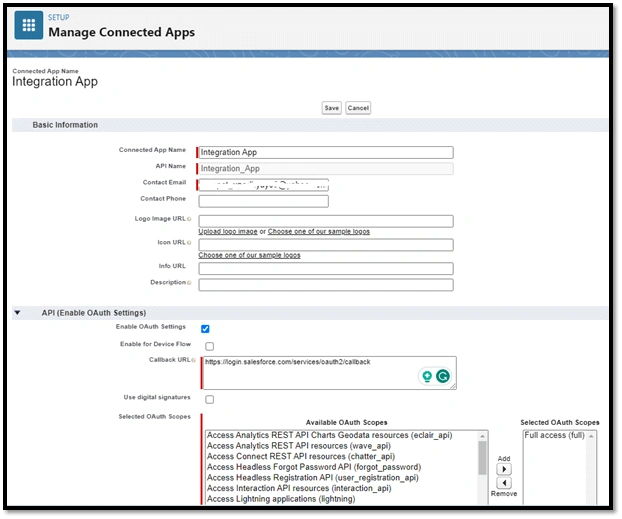
Then selectManage Consumer DetailsunderAPI details. Verify the user account by entering the Verification Code.
Copy theConsumer KeyandConsumer Secretfrom the Consumer Details section. These values should be used as the Client ID and Client Secret, respectively, in the configuration.

3. Username
The User ID of the registered user.
4. Password
The password used to authenticate the user with your Salesforce instance.
Note:
When using a Salesforce instance with a security token, append the token directly to your password without spaces or special characters. For example, if your password is Password and your security token is 12345 enter: Pasword12345
5. Token URL
-
Use the token URL to obtain authentication tokens for API access.
-
For most Salesforce instances, the token URL follows this format: https://login.salesforce.com/services/oauth2/token.
-
If you're using a Salesforce sandbox environment, use https://test.salesforce.com/services/oauth2/token instead.
-
For custom Salesforce domains, replace login.salesforce.com with your custom domain name. For example, if your custom domain is mycompany.my.salesforce.com, the token URL becomes https://mycompany.my.salesforce.com/services/oauth2/
token.token. This applies to Sandbox environments as well. -
In the Salesforce integration, we internally append /services/oauth2/token to the URL. Make sure that the URL you provide in the Salesforce integration is the base URL without the /services/oauth2/token part. For example, if your custom domain is mycompany.my.salesforce.com, the complete token URL would be https://mycompany.my.salesforce.com/services/oauth2/token, but the URL you provide in the Salesforce integration should be https://mycompany.my.salesforce.
com.com. In most cases, this is the same as the Salesforce instance URL.
NOTE: Salesforce Lightning users must use URL with *.salesforce.com domain (similar to the Salesforce instance URL) instead of *.lightning.force.com because the Salesforce API does not work with *.lightning.force.com.
6. API Version
To find the API version:
-
Go
toSetup>Quick Find>Apex Classes. ClickNew.Click theVersion Settingstab.Referto the search textbox and type Api Version. Click the first Api Versiondropdown foron theAPIlist.Version number.
Please provide these
credentialcredentials requirementsand send it to CyTech Support:
-
Salesforce instance URL
-
Client key and client secret for authentication
-
Username
-
Password
-
Token URL
-
API version
References:Reference: https://www.integrate.io/blog/salesforce-rest-api-integration/
If you need further assistance, kindly contact our support at support@cytechint.com for prompt assistance and guidance.