
How to Protect a Website with Cloudflare WAF
Introduction
This guide explains how to protect your website using Cloudflare Web Application Firewall (WAF).
Cloudflare sits in front of your website and filters all incoming traffic. By changing your DNS to go through Cloudflare, you get:
-
Protection against common web attacks (SQL injection, XSS, etc.)
-
Built-in DDoS protection
-
Free SSL certificates
-
Performance benefits from Cloudflare’s global CDN
The process takes a few steps, but once set up, all visitors to your website are automatically filtered through Cloudflare before reaching your server.
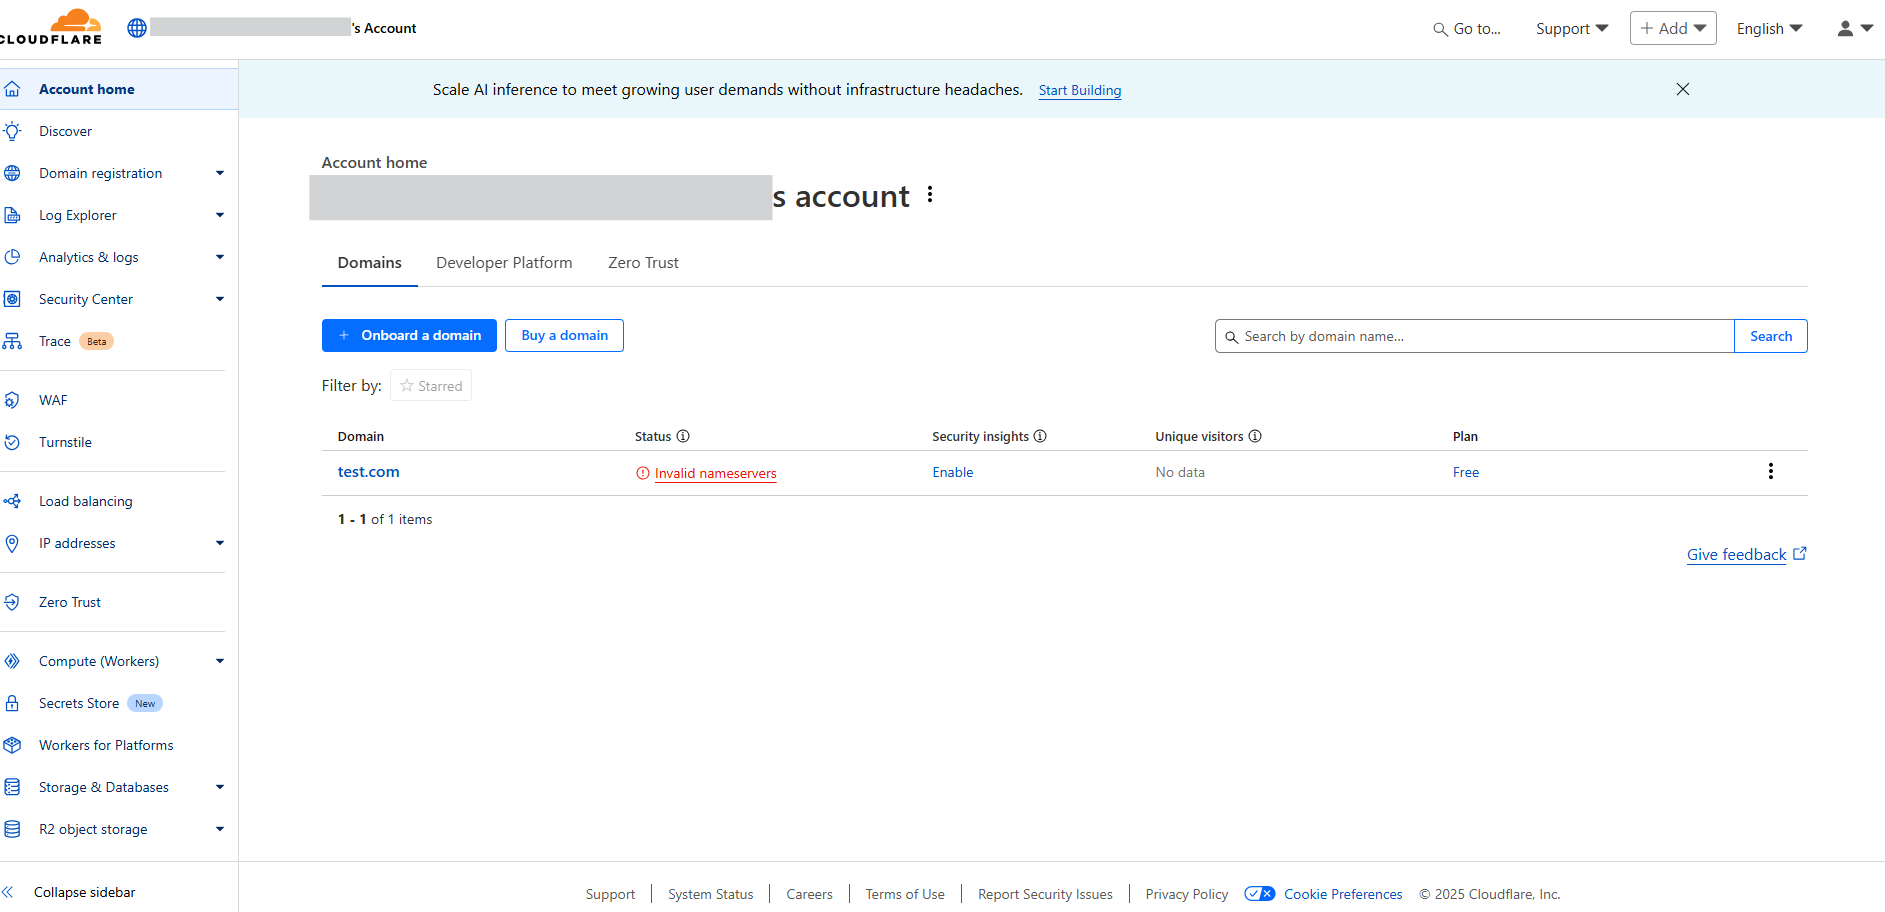
Step 1: Log in to Cloudflare
Go to https://dash.cloudflare.com and log in with your account.
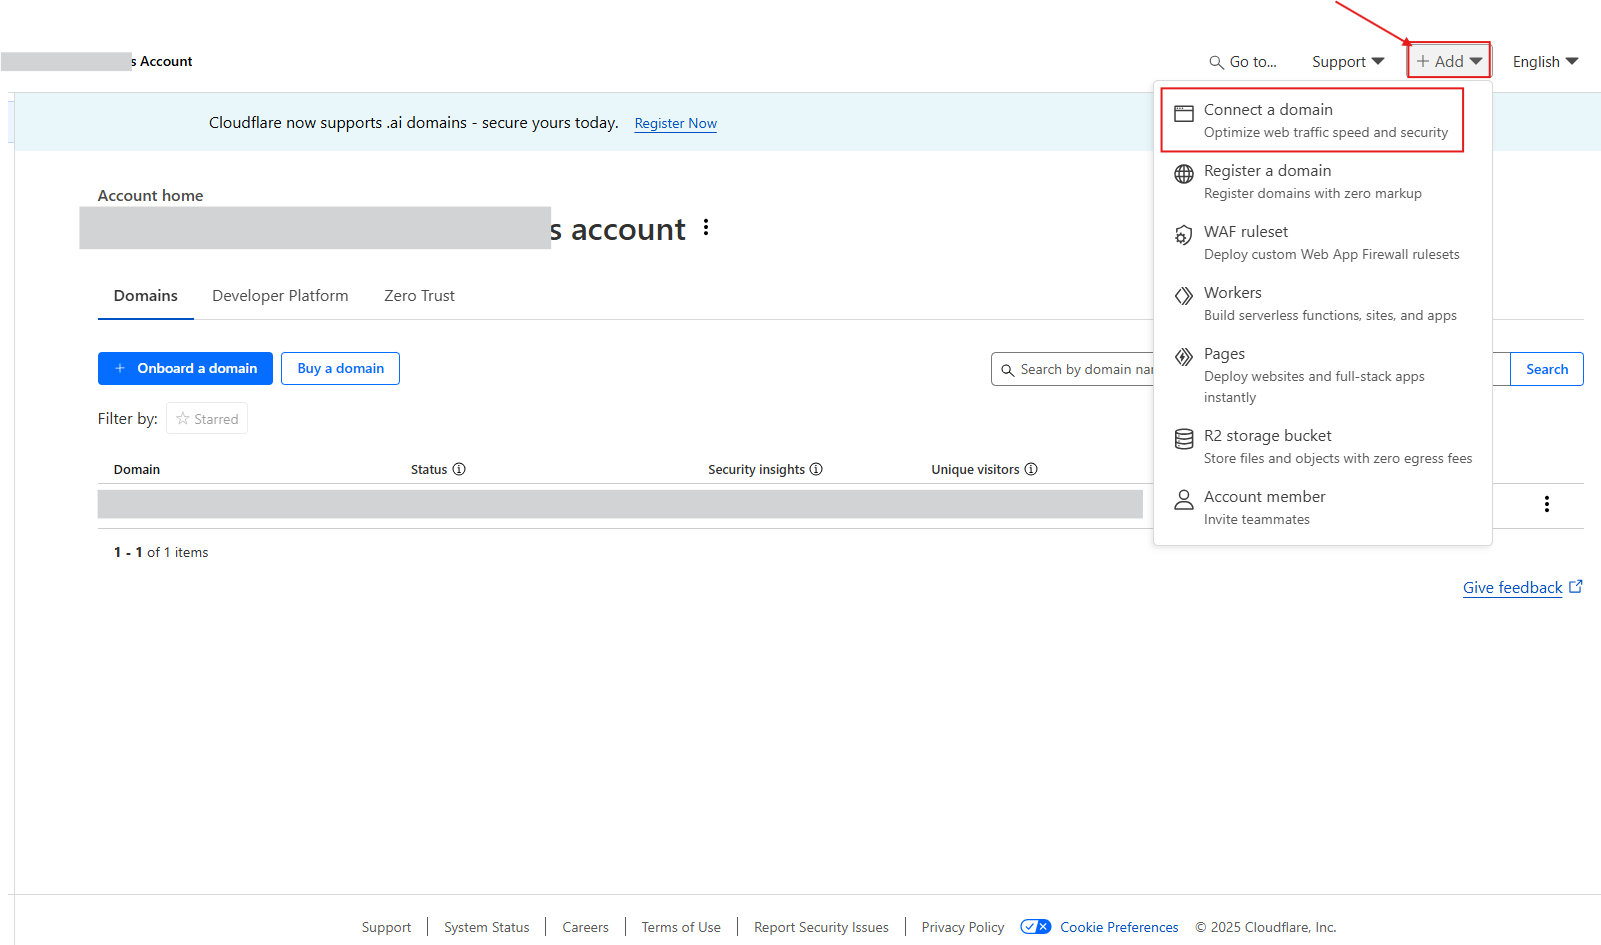
Step 2: Add Your Website
-
In the dashboard, click + Add at the top.
-
Select Connect a domain.
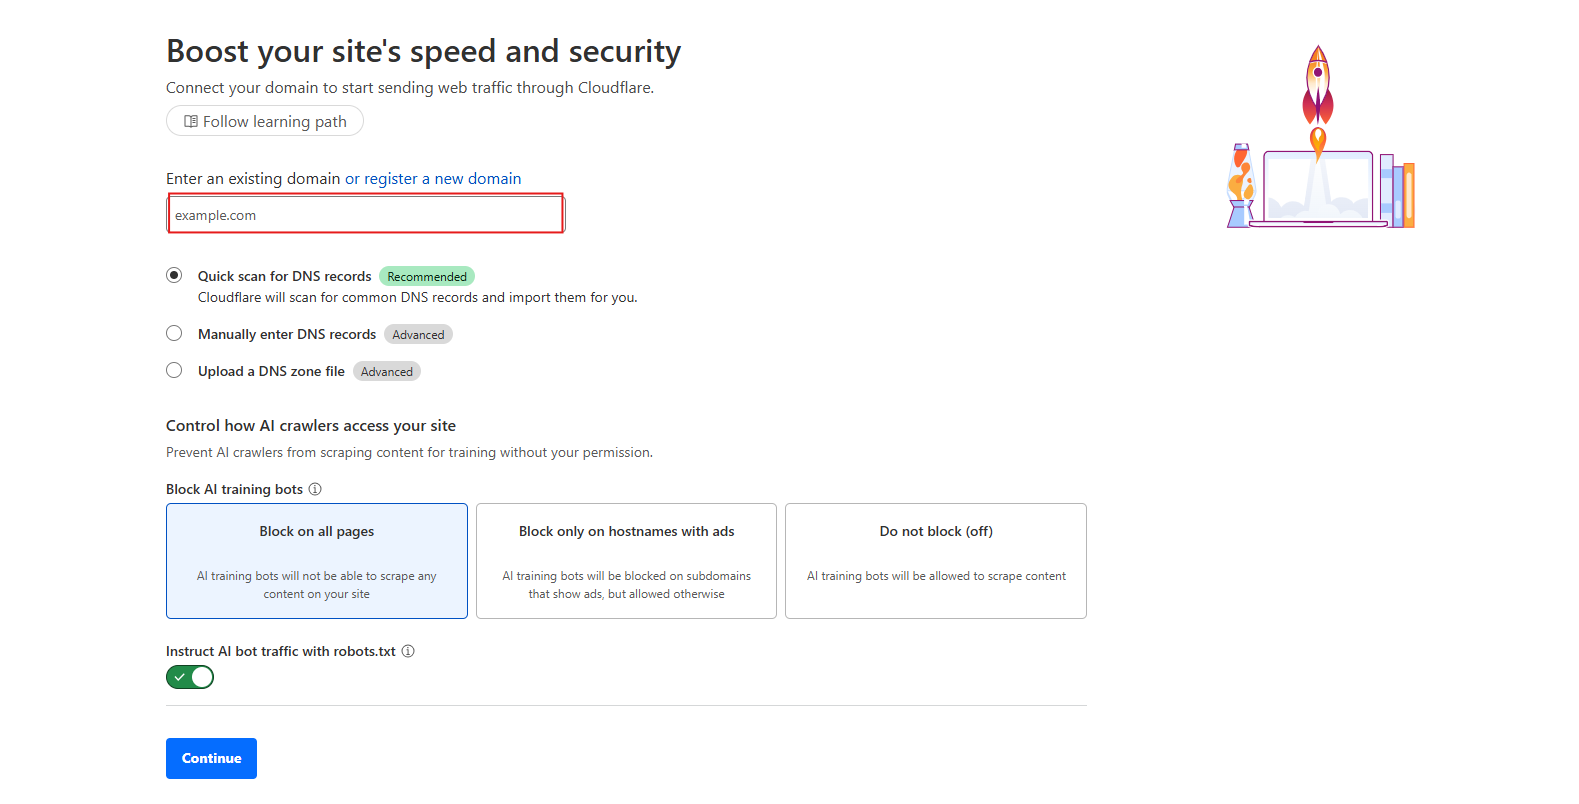
Step 3: Enter Your Domain
Type your domain name (example: yourdomain.com) and click Continue.
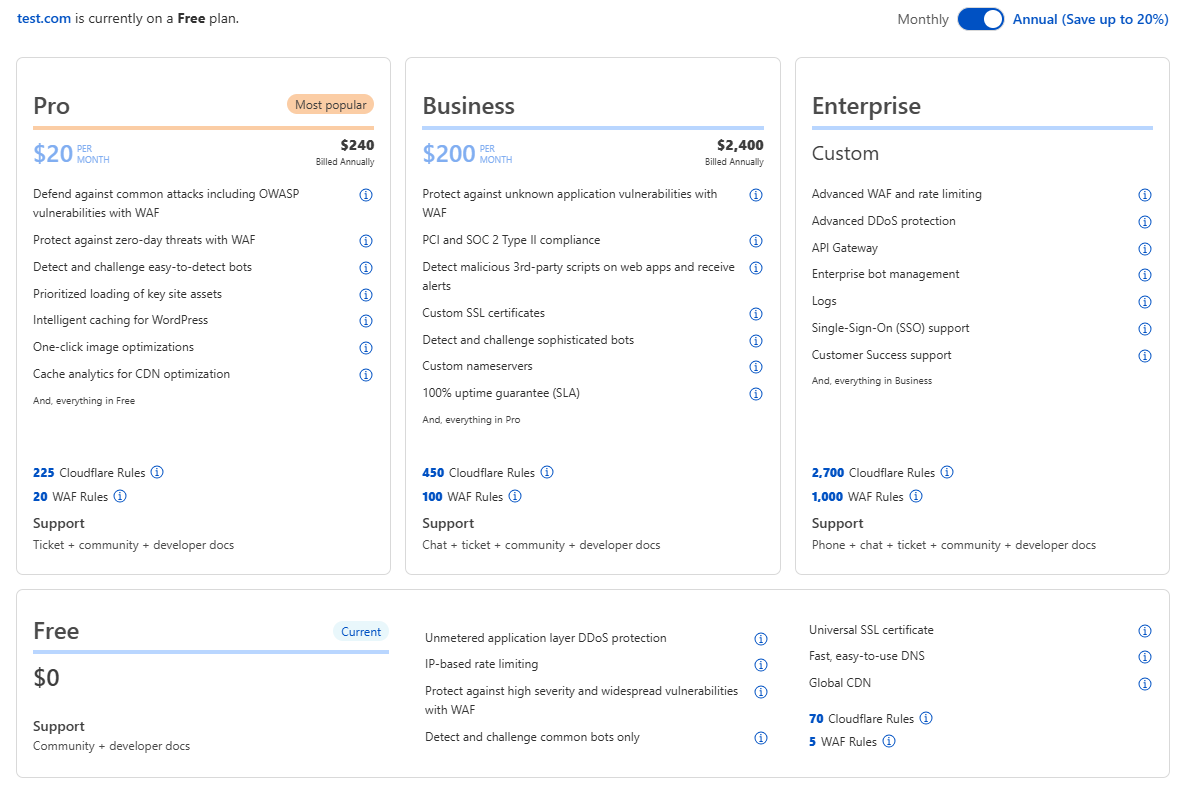
Step 4: Choose a Plan
Cloudflare will ask you to choose a plan.
-
If you just want the WAF and basic protection, select Free (Plan $0).
-
Then click Continue

Step 5: Review Your DNS Records
Cloudflare scans your existing DNS records.
-
Make sure your main records (A and CNAME for your domain and www) are there.
-
The orange cloud (Proxied) should be ON for the records you want protected by Cloudflare WAF.
-
NS (Nameserver) records should remain as DNS only (gray cloud).
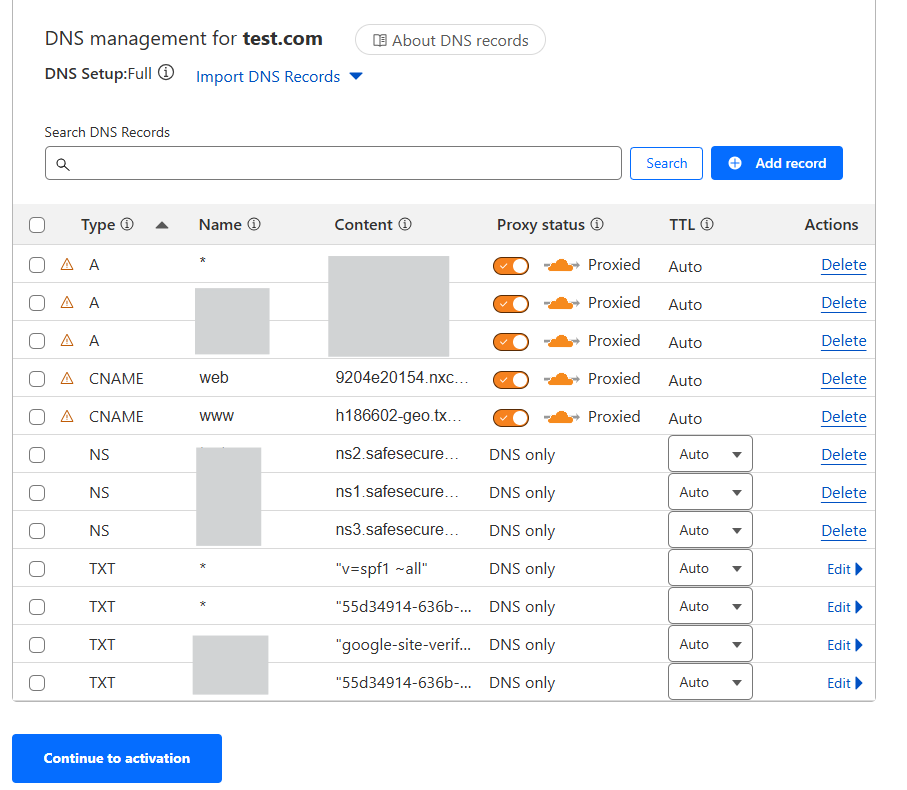
Once ready, click Continue (you don’t need to tick the checkboxes).
Step 6: Change Your Nameservers
Cloudflare will give you two new nameservers.
Go to your Cloudflare dashboard → Websites → select your domain → DNS → scroll to Cloudflare Nameservers section.
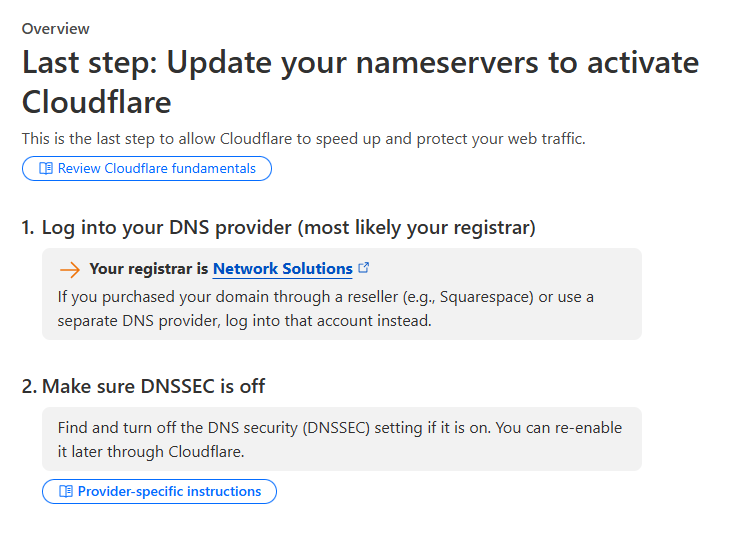
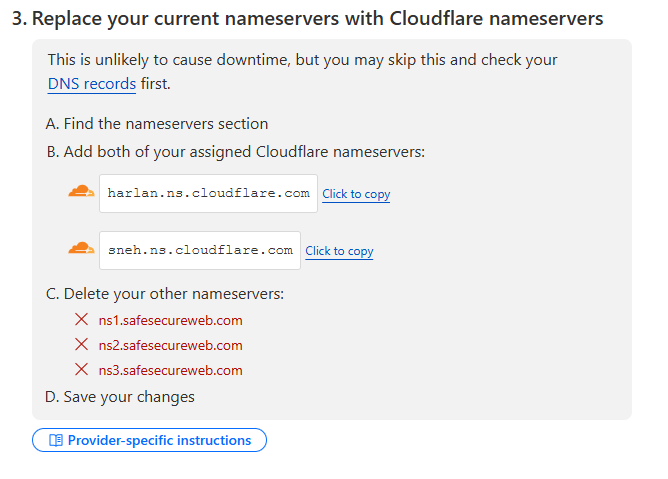
-
Go to your domain registrar (the company where you bought your domain, like GoDaddy or Namecheap).
-
Replace the old nameservers with the Cloudflare ones.
-
Save changes.
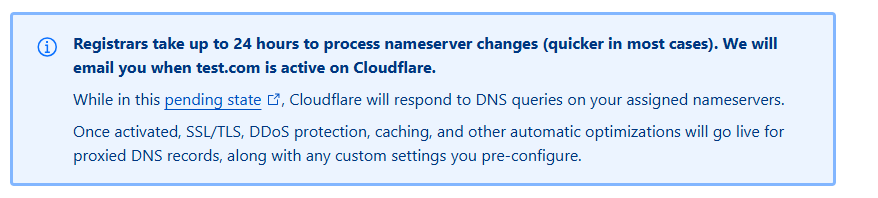
Step 7: Wait for Propagation
DNS changes take time. Usually, 15 minutes up to 24 hours.
When Cloudflare detects the change, your site will show as Active in the dashboard.
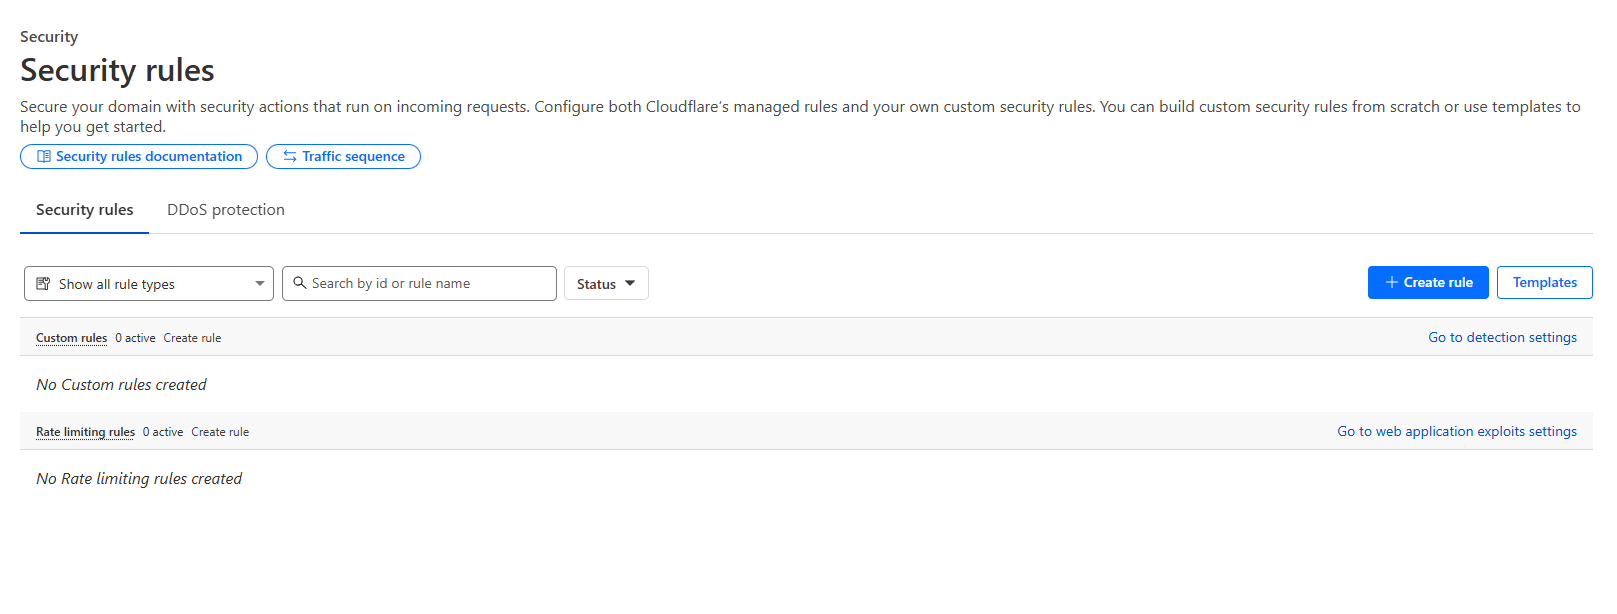
Step 8: Enable WAF Protection
-
In the dashboard, go to Security > Security Rules > WAF.
- Enable
TurnManagedonRulesetsthe(Cloudflare OWASP Core Ruleset, Cloudflare ManagedRuleset.Ruleset). -
Cloudflare will now filter malicious traffic before it reaches your site.
-
Optionally create Custom Rules (e.g., block countries, rate limit requests, block SQL injection patterns).
-
Test in “Simulate” mode before switching to “Block” to avoid false positives.
Step 9: Verify
-
Use a tool like dig or nslookup to confirm the domain resolves to Cloudflare IPs (not your origin server).
-
Try visiting the site; Cloudflare headers like cf-cache-status should appear.
-
You can also test WAF by visiting http://yoursite.com/?<script>alert(1)</script> (Cloudflare should block it if rules are active).
If you need further assistance, kindly contact our technical support at support@cytechint.com for prompt assistance and guidance.