
AQUILA - SNIFF & Detect
Outlook Add-in for Microsoft 365
Overview
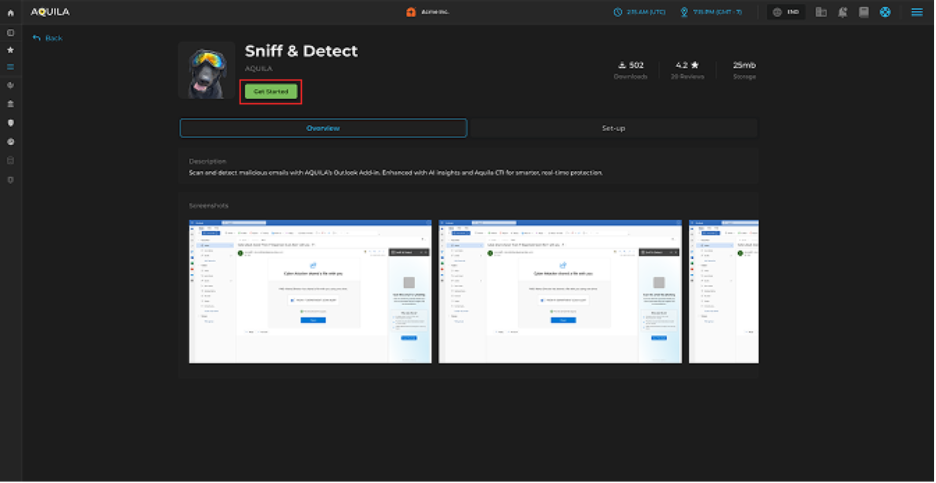
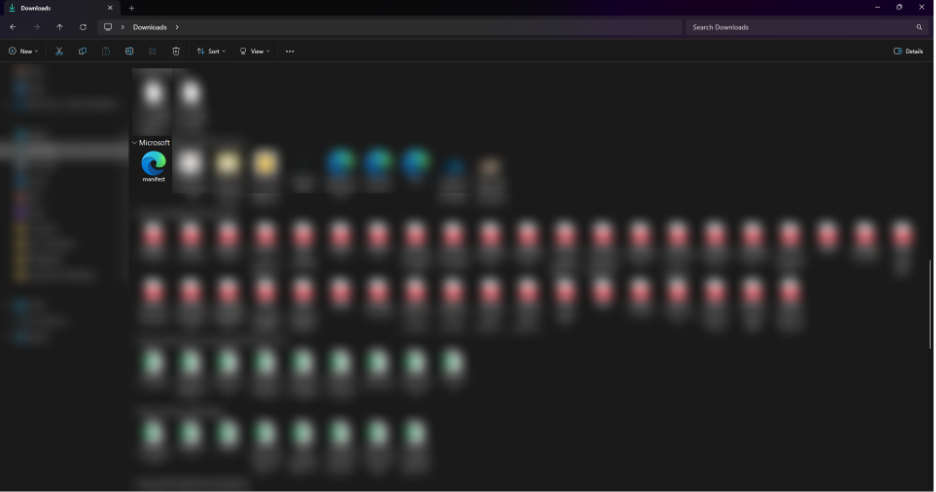
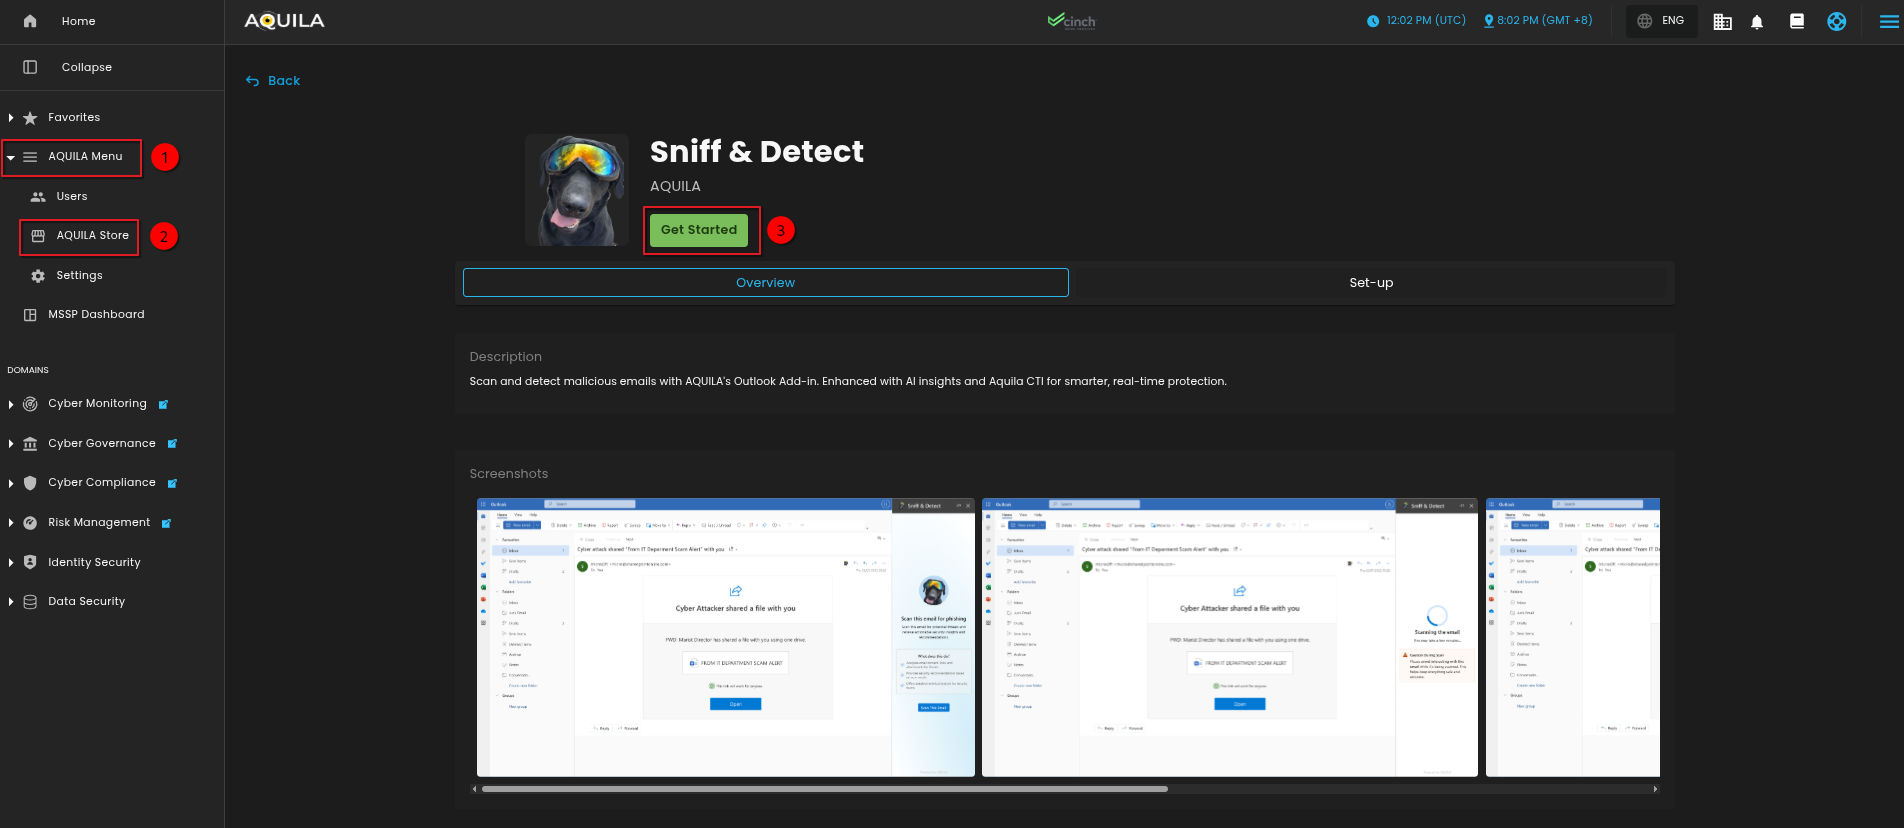
1.AQUILA Download– SNIFF & Detect is a custom integration app within the AQUILA platform that enables Microsoft 365 environments to deploy advanced malicious email detection capabilities.SniffThe app is packaged as a manifest.xml file and Detect from AQUILA Store. The downloaded file shouldcan be “manifest.xml”added
2.tenant Logvia intothe Integration Apps section in the Microsoft 365 Admin Center.
Key Capabilities & Value
-
Seamless Integration – Install in Microsoft 365 with just a few clicks, no complex infrastructure required.
-
Permission-Driven Security – Requires admin approval to grant permissions, ensuring a secure deployment process.
-
Centralized Control – Managed via AQUILA and distributed through the AQUILA Store for consistent updates.
-
AI-Enhanced Detection – Uses AQUILA’s AI and Cyber Threat Intelligence to scan and detect malicious emails in real time.
-
User-Friendly Accessibility – Appears in the “More apps” section for assigned users, making it easy to launch.
-
Minimal Footprint – Only ~6 KiB in size, ensuring fast installation without performance impact.
Installation & Deployment Manual – Simple Step-by-Step
-
Download the Integration Package
-
Visit the AQUILA Store and download the Sniff & Detect integration (manifest.xml).
-
-
Access Microsoft 365 Admin Center - https://admin.microsoft.com
-
Log in as a Global Admin or Exchange Admin.
-
-
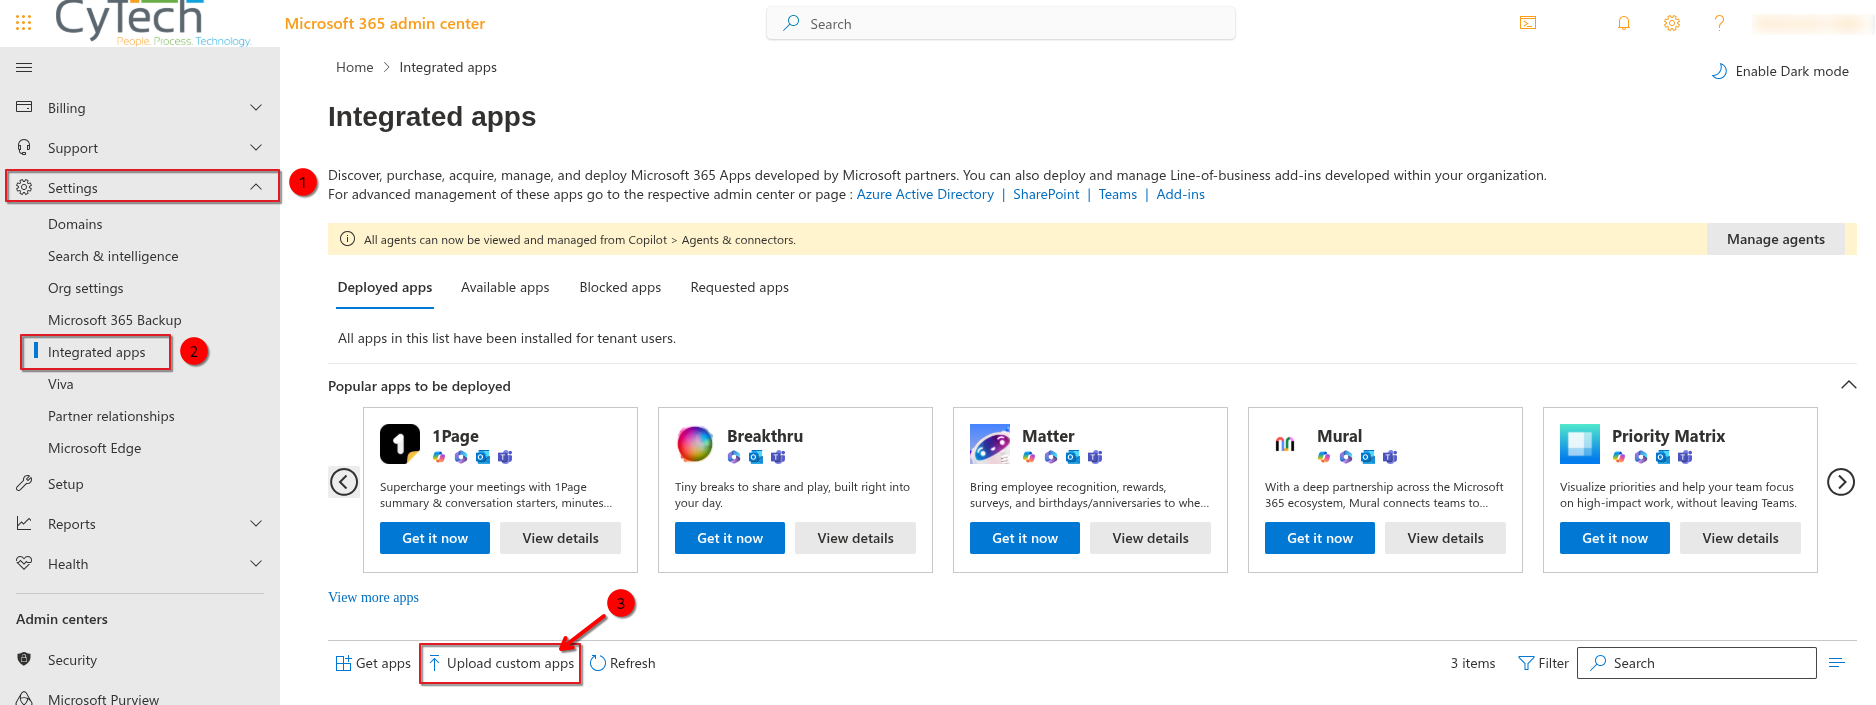
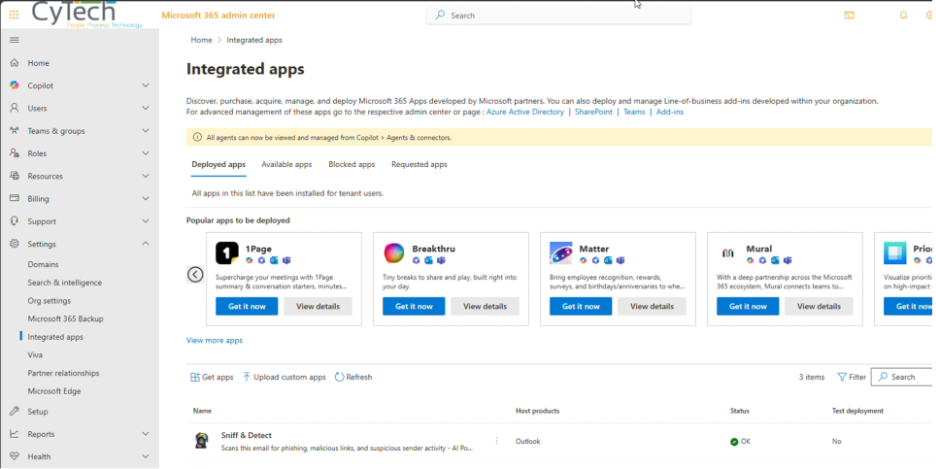
Upload the Integration
-
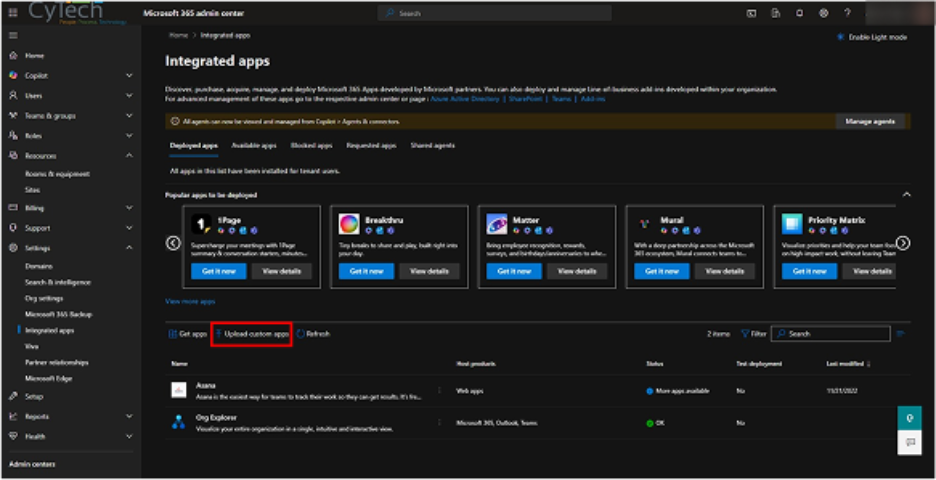
Go to Settings → Integration
→Apps.Apps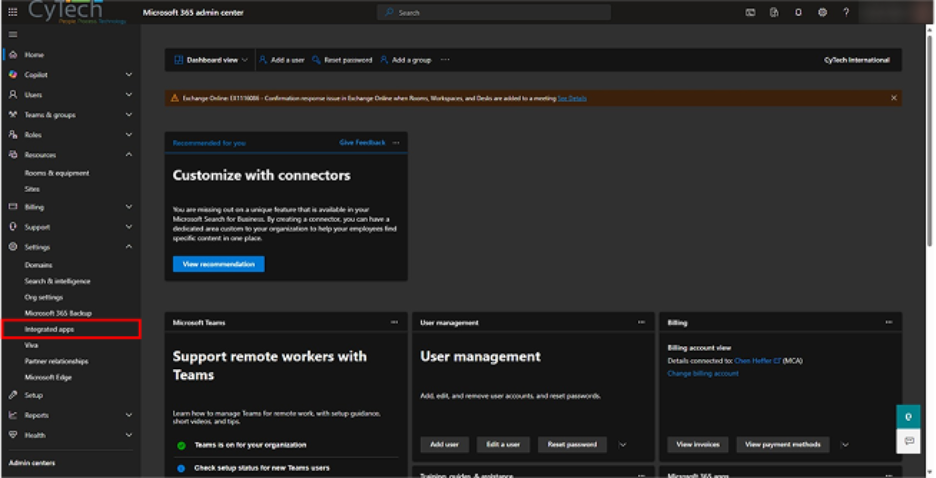
3. Upload the “manifest.xml” viaUpload CustomApps.Apps
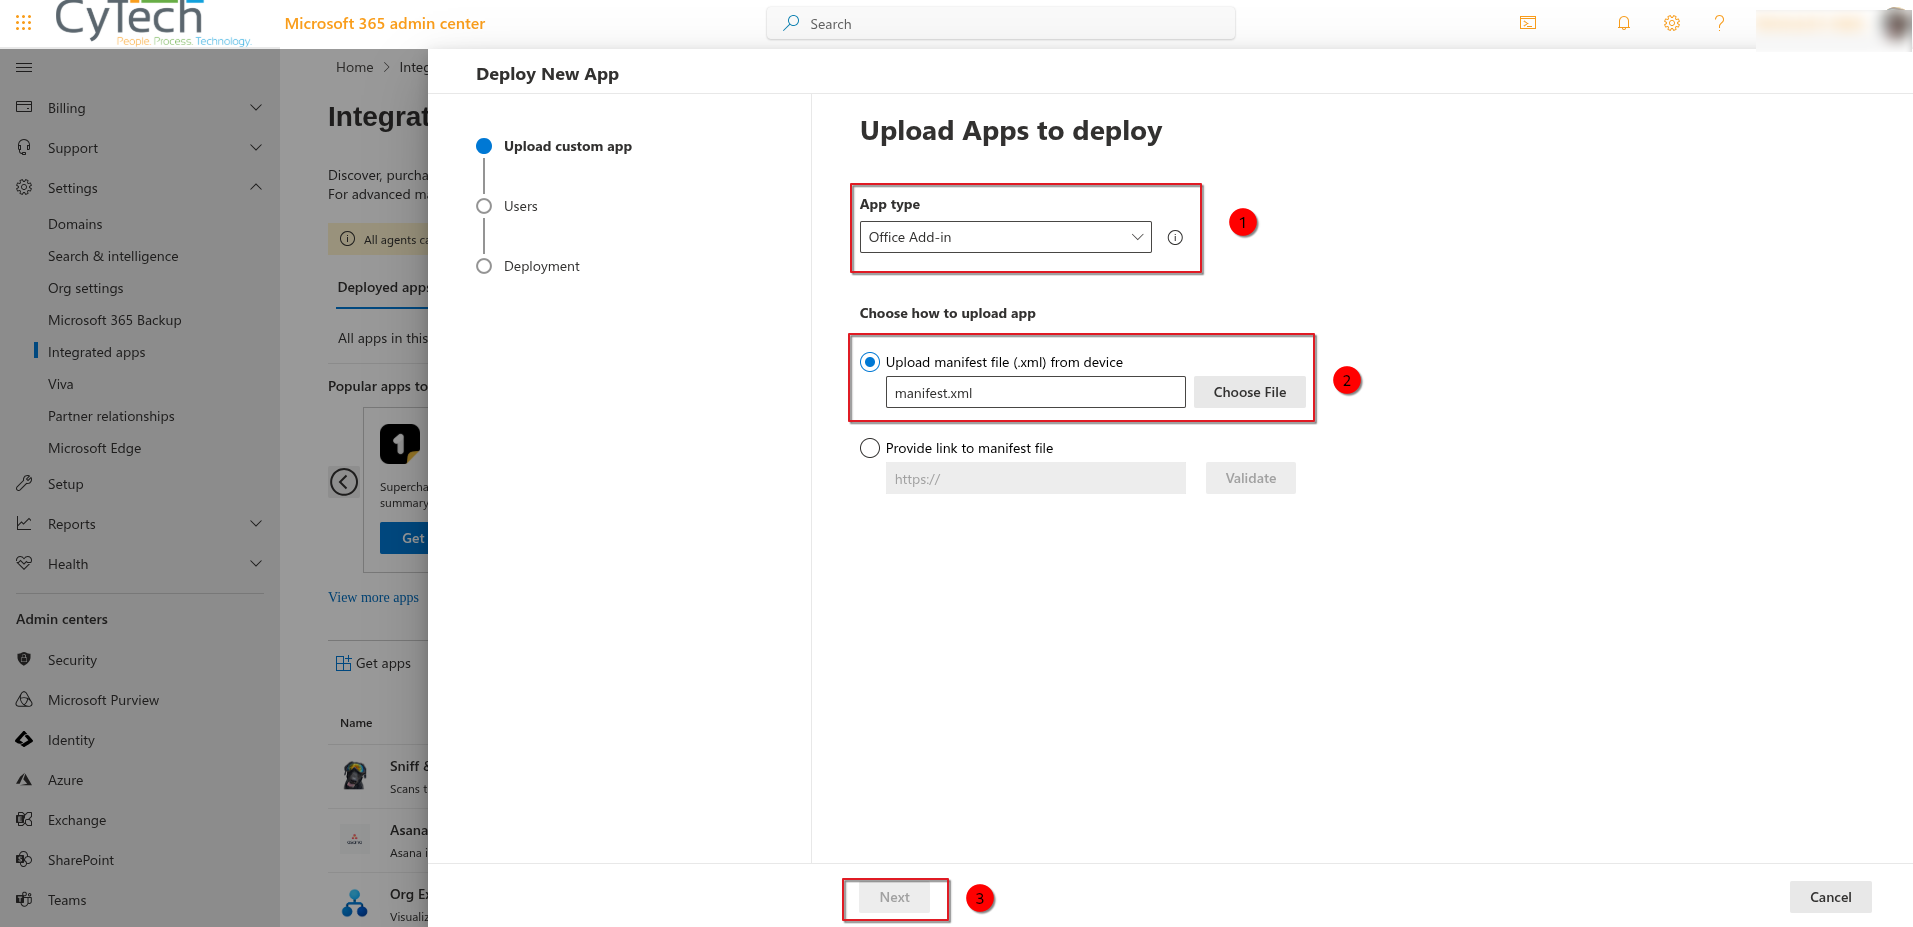
4.Follow the steps to Deploy the Sniff and Detect App .- App Type → Office Add-in
-
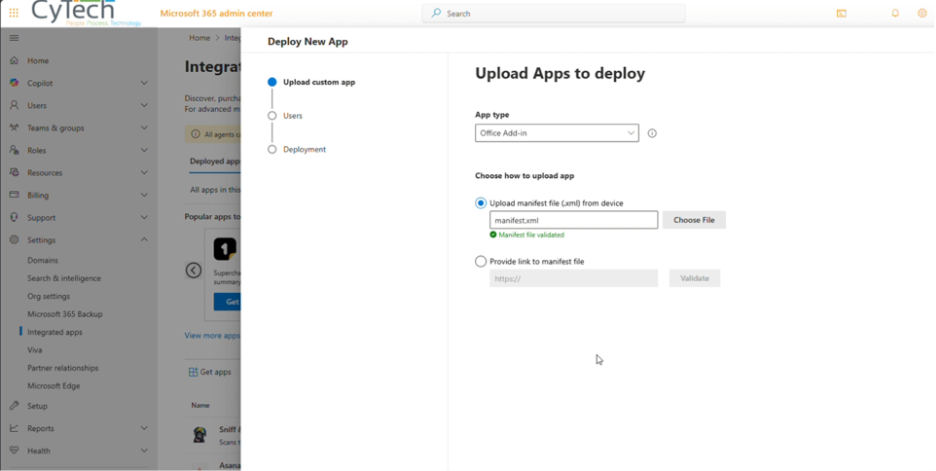
Choose how to upload app → Upload Manifest file (.xml) from device→ Choose the manifest.xml file.
-
-
Deploy and Assign Users
-
5.AssignAddtheUsers who will have accessapp to the relevant users or groups.Sniff and Detect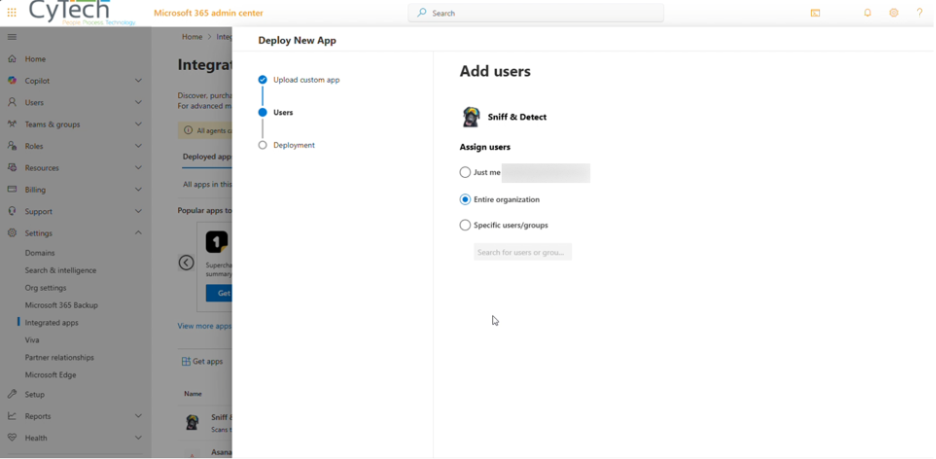
App -
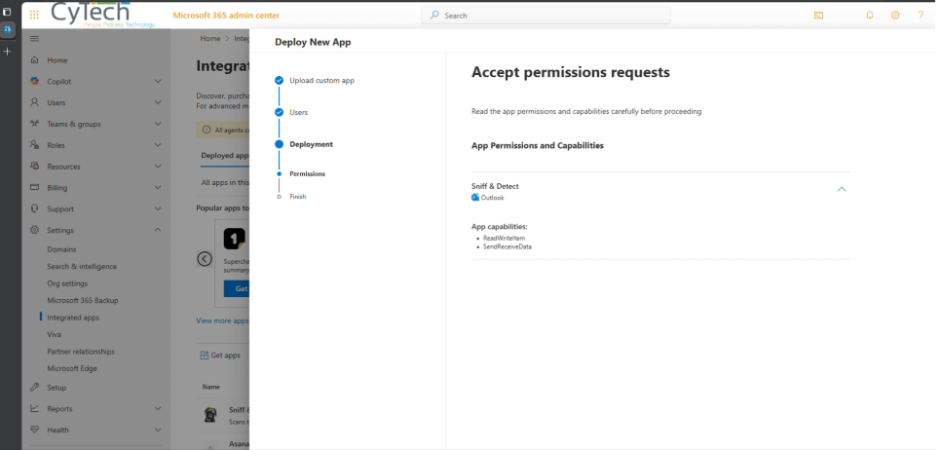
Grant Permissions
-
Accept all required permissions:
-
ReadWriteItem
-
SendReceiveData
-
-
-
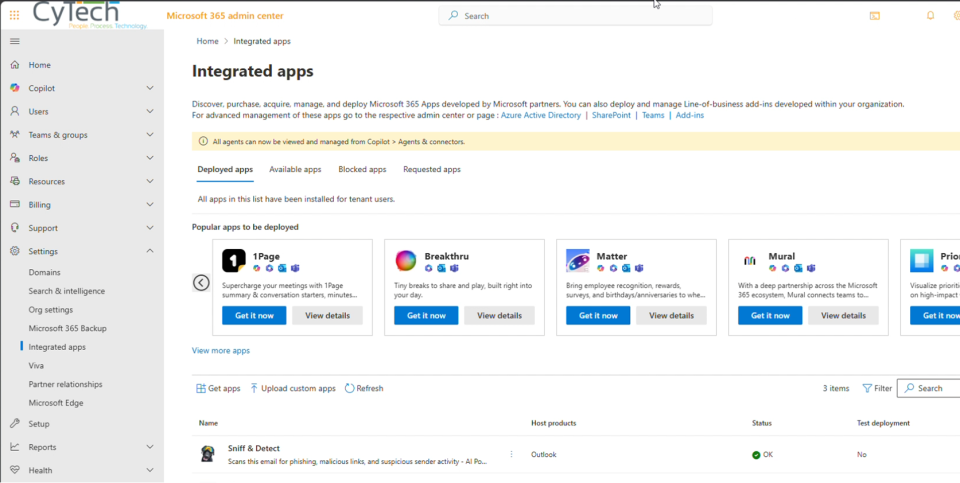
Allow Propagation Time
6. AcceptIn thepermissionsIntegratedrequiredAppsforpage of the Admin Center, confirm the add-in appears with status 'OK'.Sniff-
7.Sniff and Detectshould display in your list. It can takeWait up to 72 hoursbeforefor the appwillto becompletelyavailabledisseminatedacross all assigned accounts.
and Detectto successfully run -
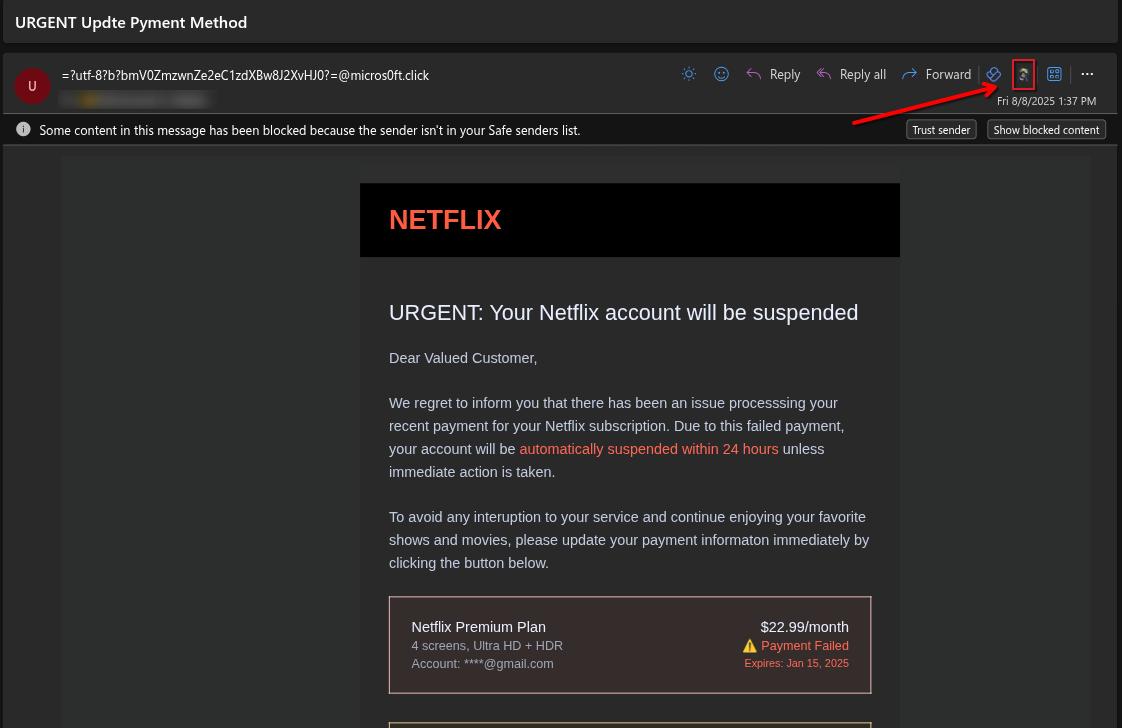
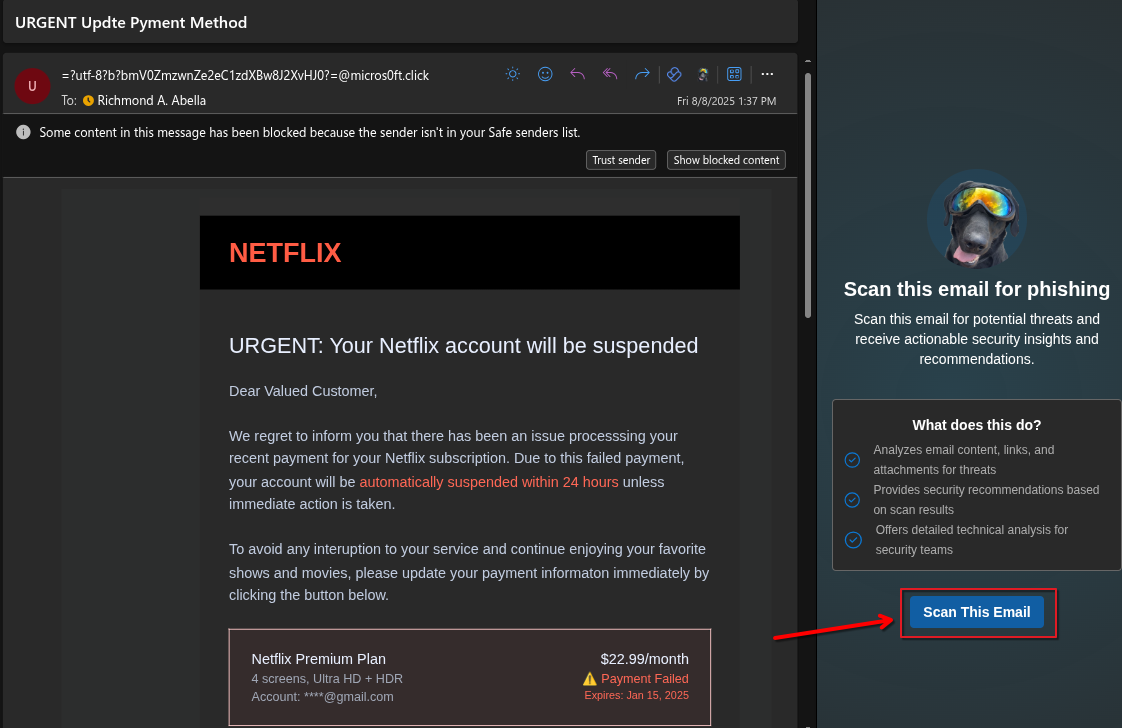
Access the App
- Open Outlook and check the apps panel to
allensureusersSniff & Detect is listed and accessible. -
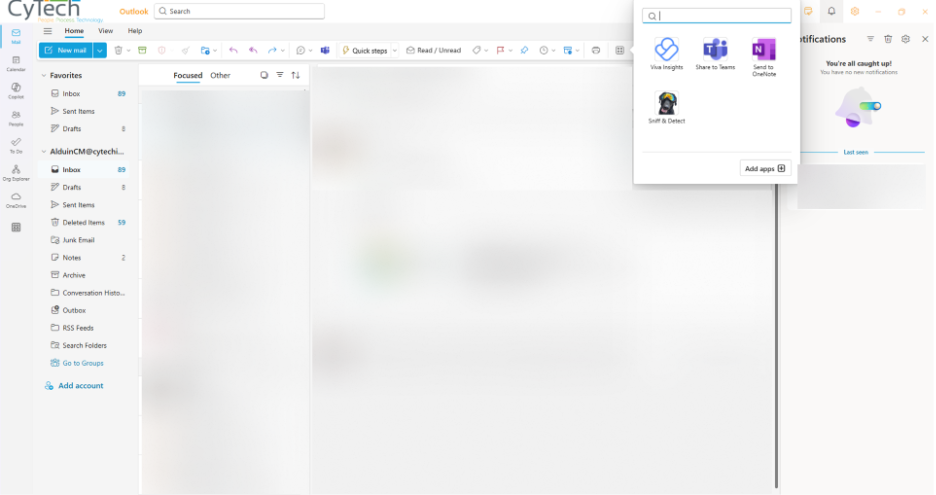
Users can launch it from More apps in
theMicrosoftorganization.365.
- Open Outlook and check the apps panel to


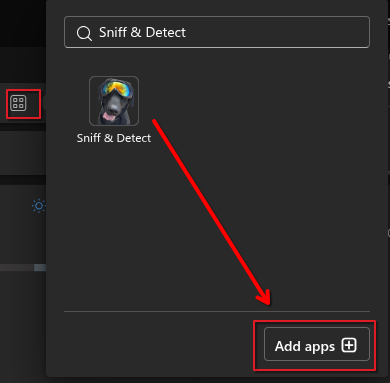
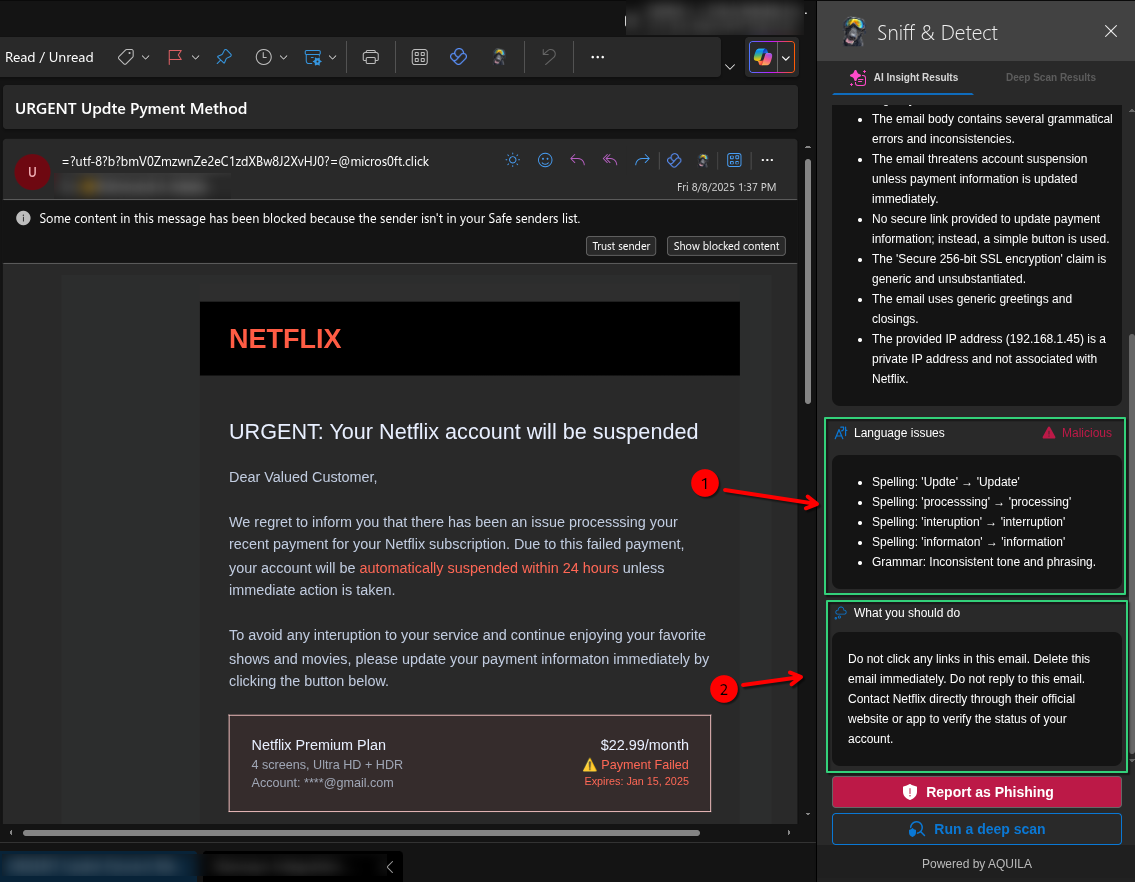
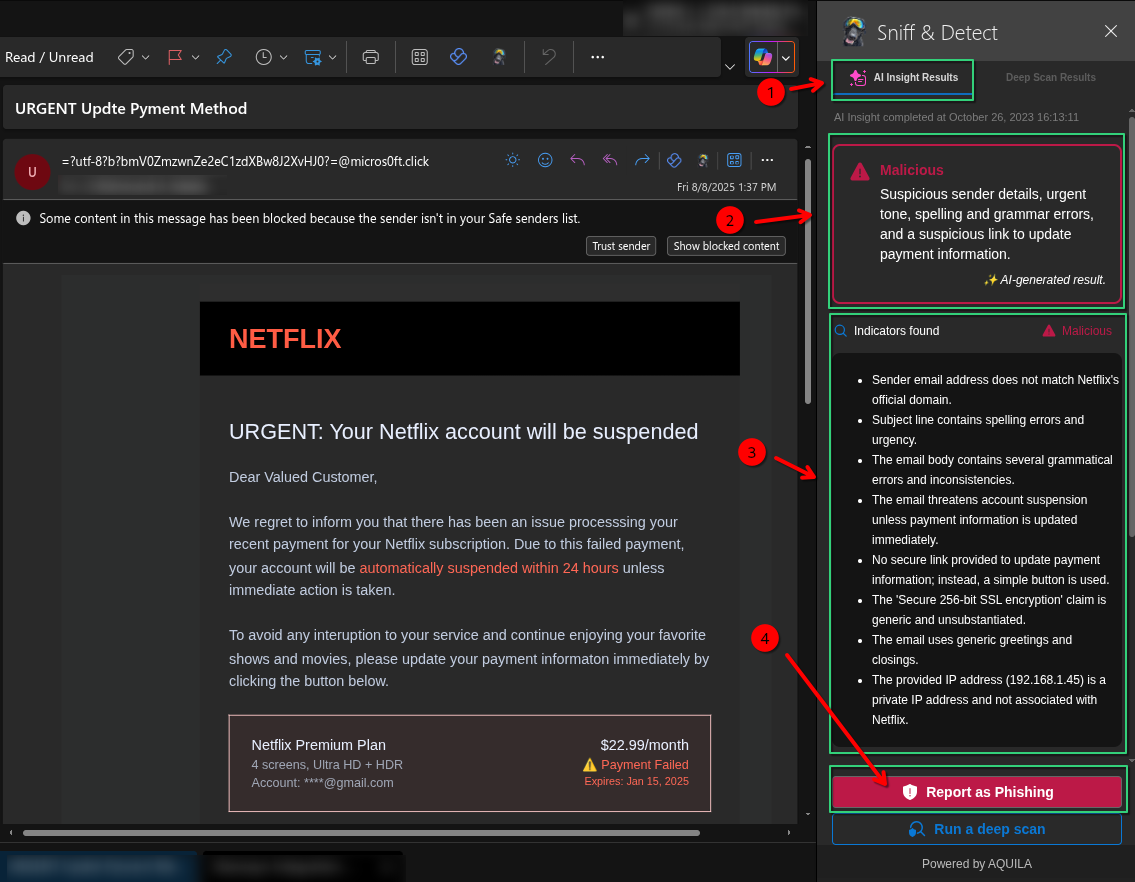
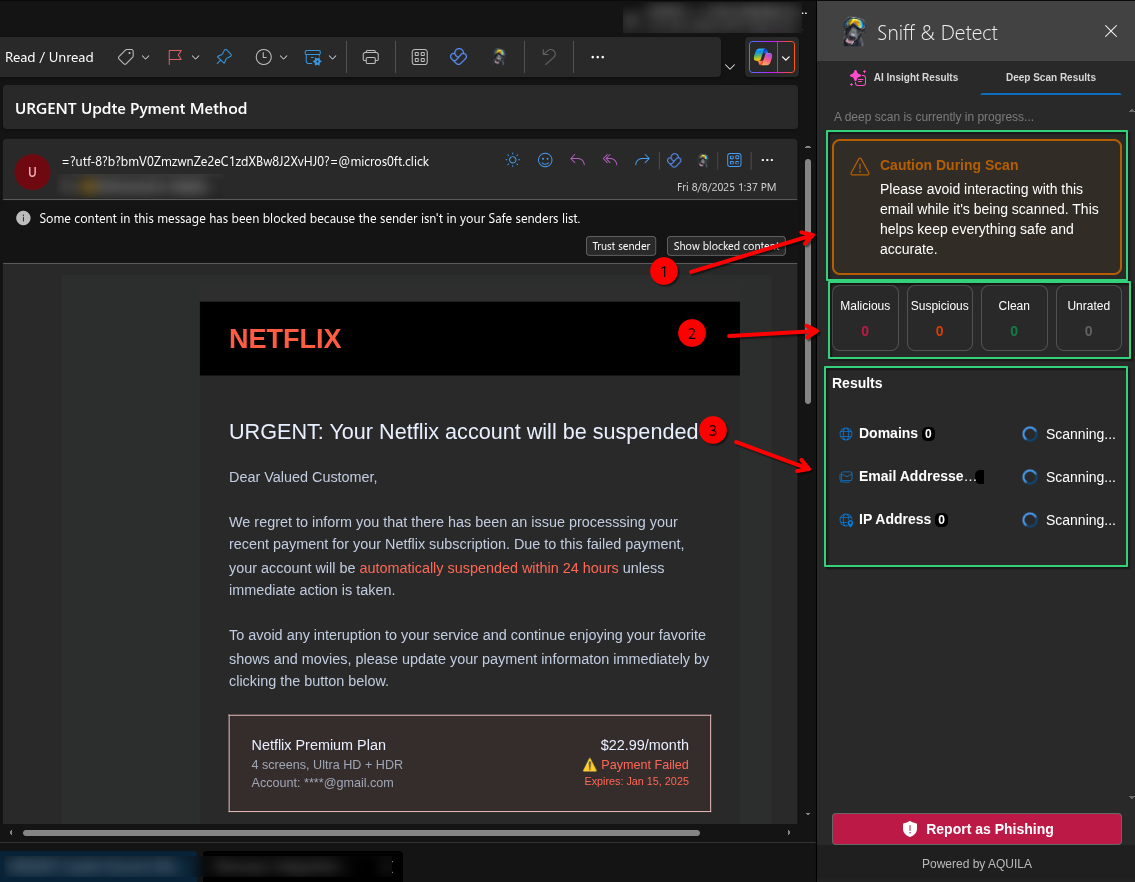
8. Users should be able to see the Sniff and Detect app by clicking on the “More apps” menu ![]()
If you need further assistance, kindly contact our support at support@cytechint.com for prompt assistance and guidance.