
AQUILA - Mimecast API v2 Integration
Mimecast Integration Guide
Integrate Mimecast with your security platform via API to collect email threat data, archive logs, DLP events, and other security-related logs for centralized visibility and incident response.
API 2.0 is the current standard - It's been generally available for over a year and is what Mimecast recommends for new integrations
Credentials & API Access Setup (Mimecast API v2)
Before configuring the integration, prepare your API credentials from the Mimecast Admin Console.
Needed Credentials:
- API URL
- Client ID
- Client Secret
Creating an API 2.0 Application:
To create an API 2.0 Application, follow the steps below:
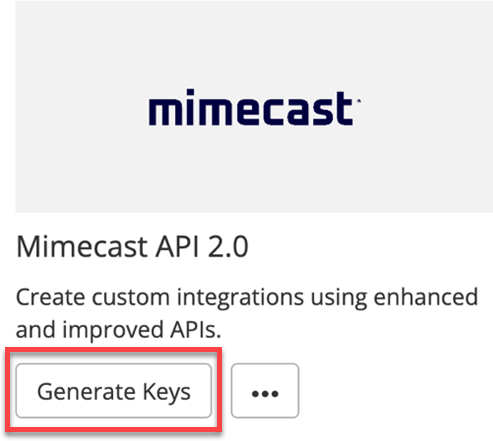
- Log in to Mimecast Administration Console
- Navigate to Integrations | API and Platform Integrations
- Locate the following Mimecast API 2.0 tile and click on Generate Keys.
-
After reading the Terms & Conditions, complete the I accept check box to enable the Next button to progress onto the next step.
-
Complete the Application Details section.
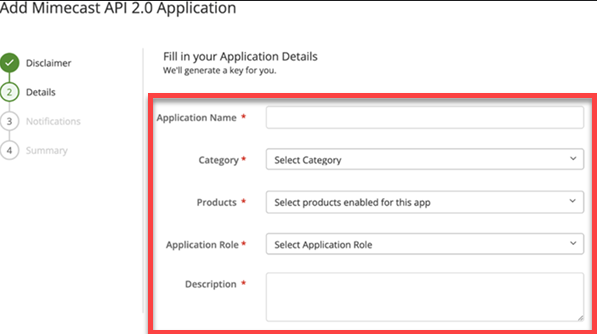
- We highly recommend creating a dedicated custom role with only the permissions required for the Application to function.
- Select the minimum set of Products the App needs to access to function.
- Should we need to contact you regarding this API application, please provide details for a Technical Point of Contact.
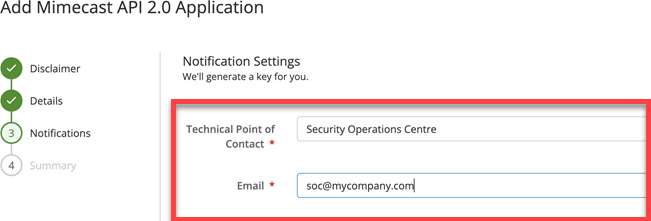
Mimecast recommends a group rather than an individual contact.
- Review the Summary information for the API application and click on Add if you are happy to proceed with creating the application.
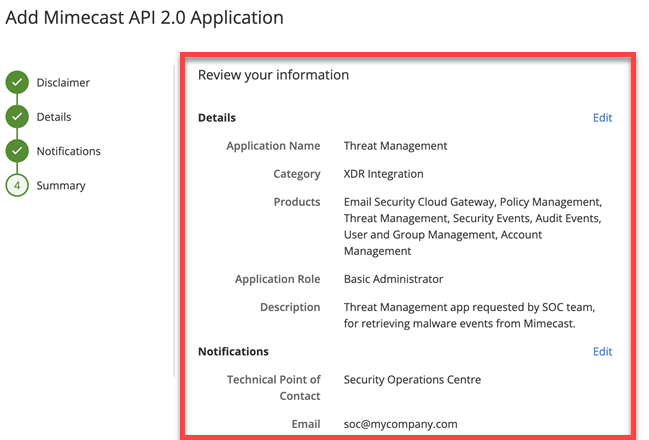
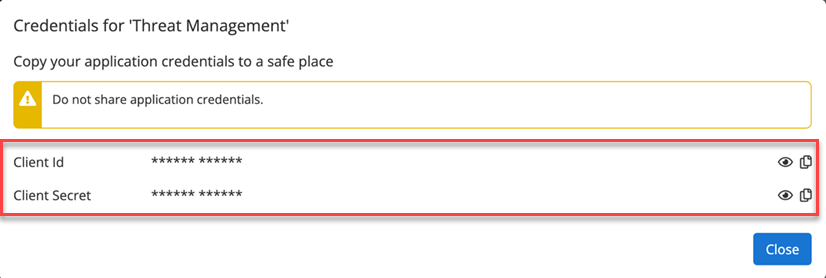
8. The wizard completes and displays a pop-up window including your Client ID and Client Secret key data, where you can copy and save the credentials for the API application.
Base URL (Mimecast API v2)
To transition from your current API 1.0 URLs to API 2.0, we provide three API gateway options tailored to fulfill your performance, compliance, and data residency requirements:
- Global URL: The global API URL api.services.mimecast.com which serves traffic from the nearest instance ensuring reduced latency and enhanced performance.
- UK Instance URL: For compliance and data residency requirements, customers can choose to process traffic via the UK instance using the regional URL: uk-api.services.mimecast.com. This ensures API traffic is only processed within the UK instance of the Apigee Gateway.
- US Instance URL: Similarly, customers with compliance or residency requirements in the US can use us-api.services.mimecast.com to process API traffic exclusively through the US instance of the Apigee Gateway.
| Factor | Global URL | UK Instance URL | US Instance URL |
|---|---|---|---|
| URL Details | api.services.mimecast.com | uk-api.services.mimecast.com | us-api.services.mimecast.com |
| Availability | ✅Auto failover for high uptime |
Aquila Integration Configuration
AQUILA – Mimecast Integration
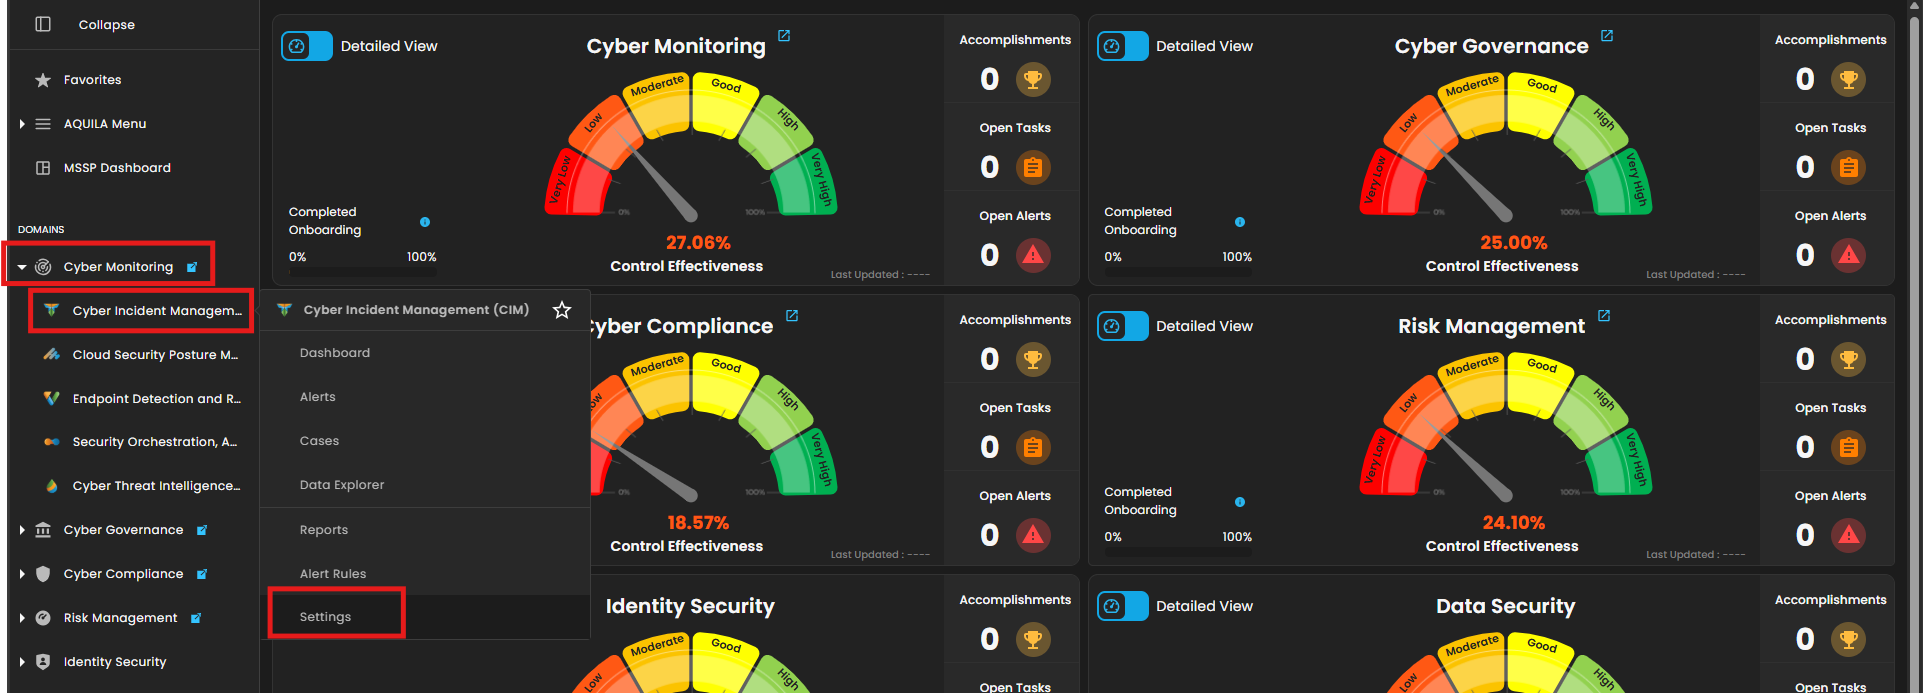
1. Log in to AQUILA click here - CyTech - AQUILA. Choose Cyber Monitoring -> Cyber Incident Management (CIM) -> Settings.
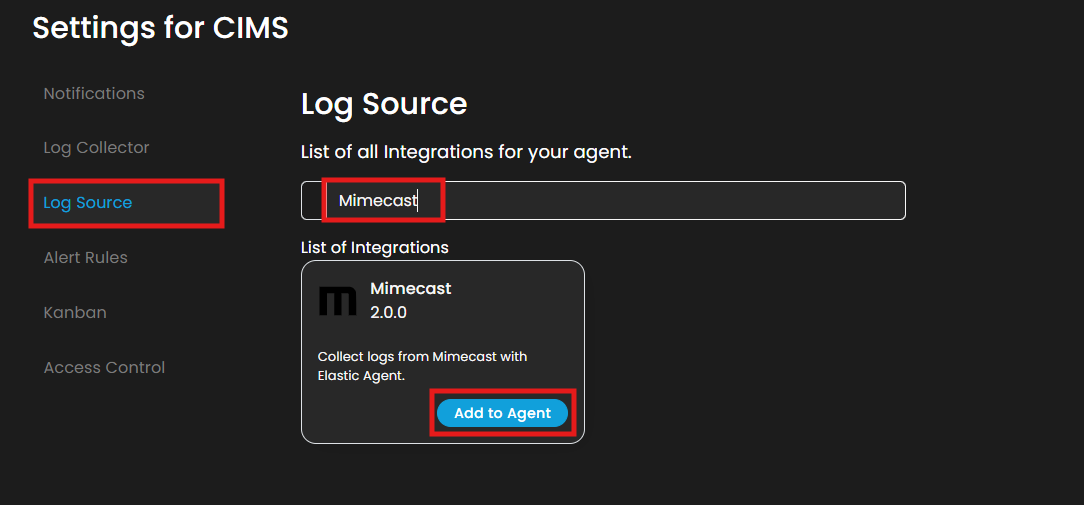
2. Navigate through Log Source -> Search Bar (Search the Source to Add) -> Add to Agent.
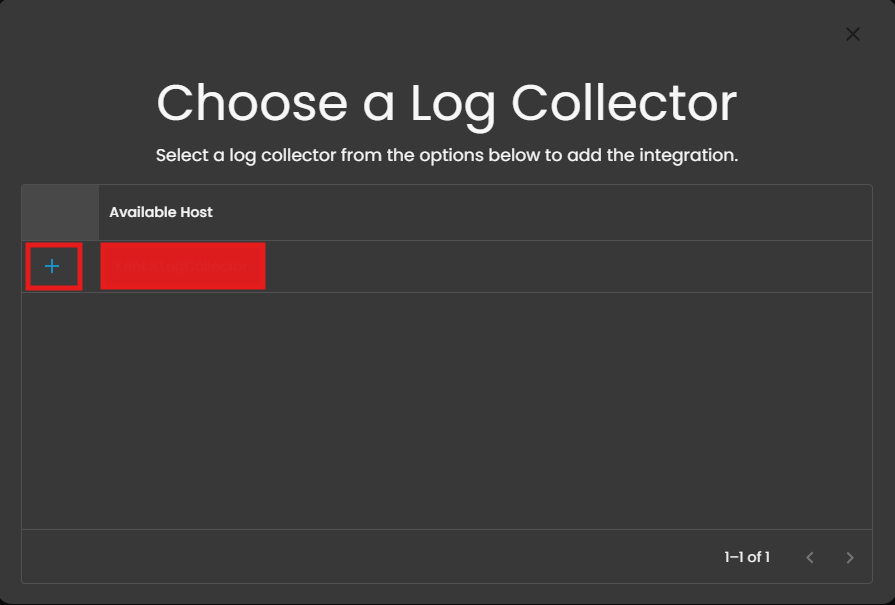
6. Choose your Log Collector. (If you not yet installed your Log Collector please refer to this link - Log Collector Installation.)
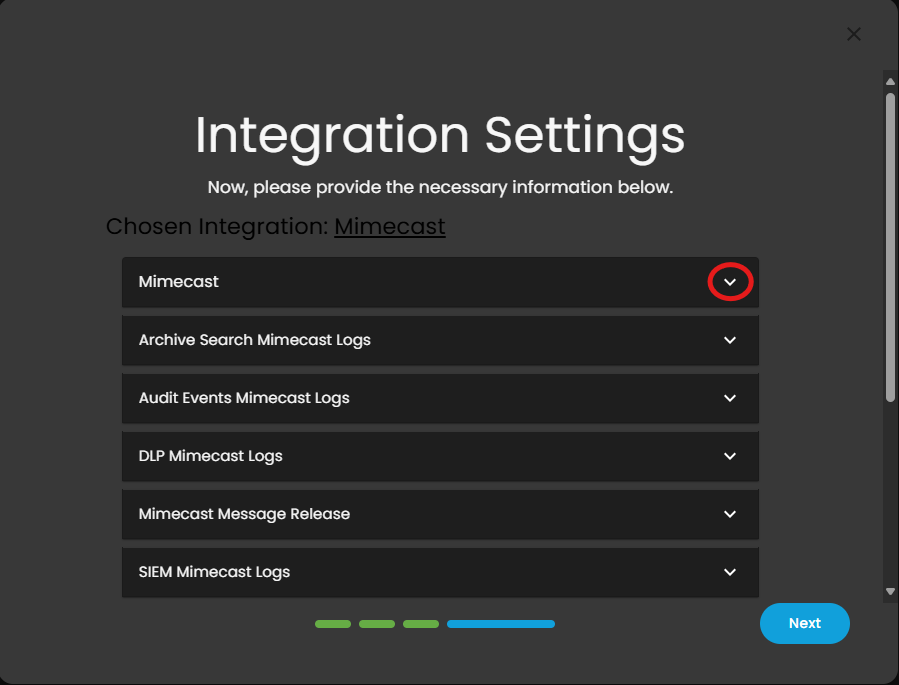
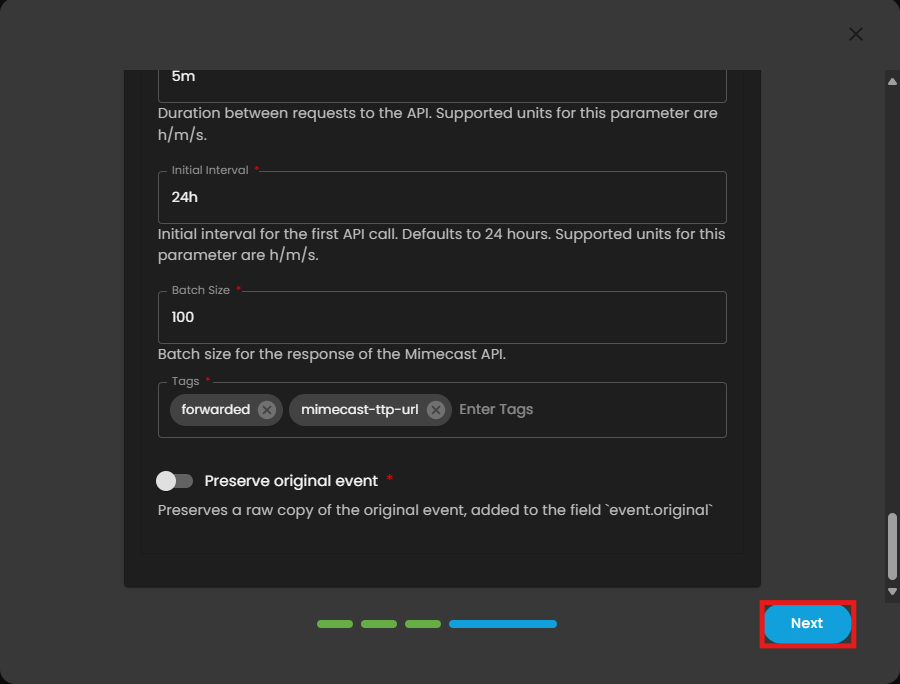
7. In the integration settings follow the instructions given below.
- Click the drop-down arrow to display the contents needed for the integration setup.
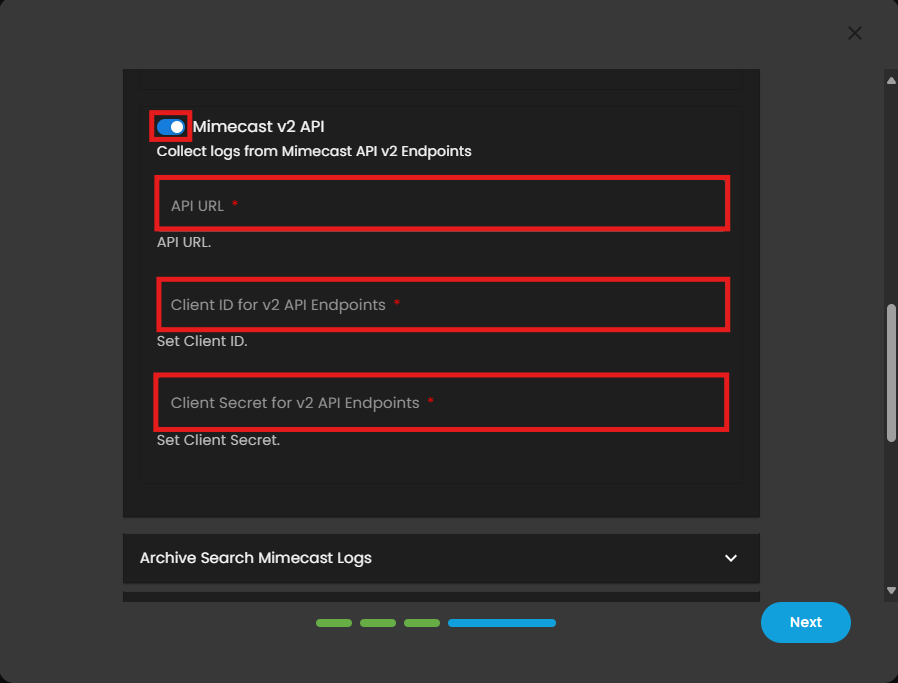
- Upon clicking the drop-down arrow, disable the v1 API.
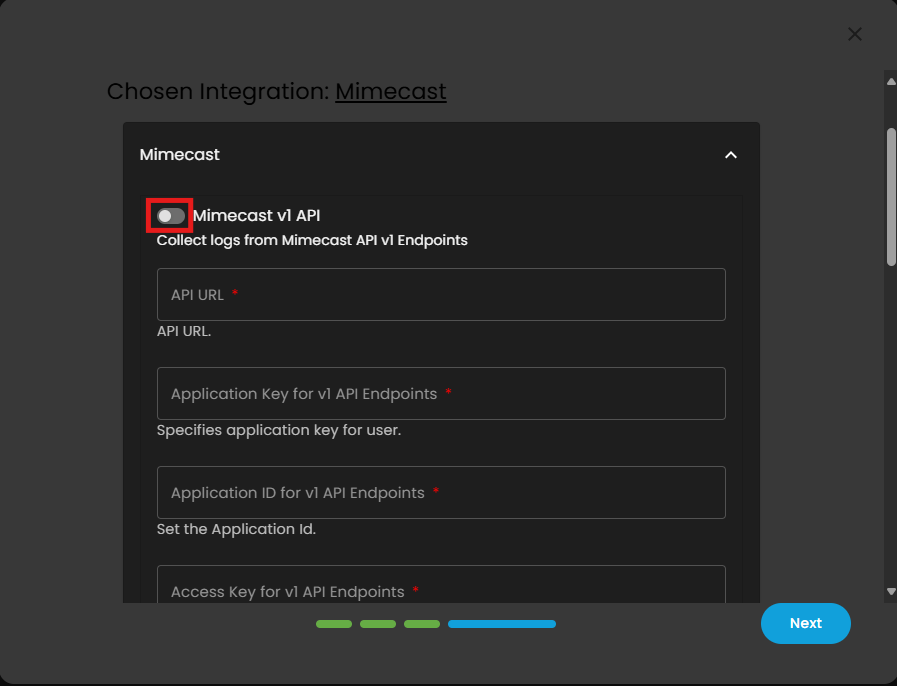
- This integration we will use the v2 API. Input the required Fields: Client ID, Client Secret and API URL (Mimecast API v2 base URL).
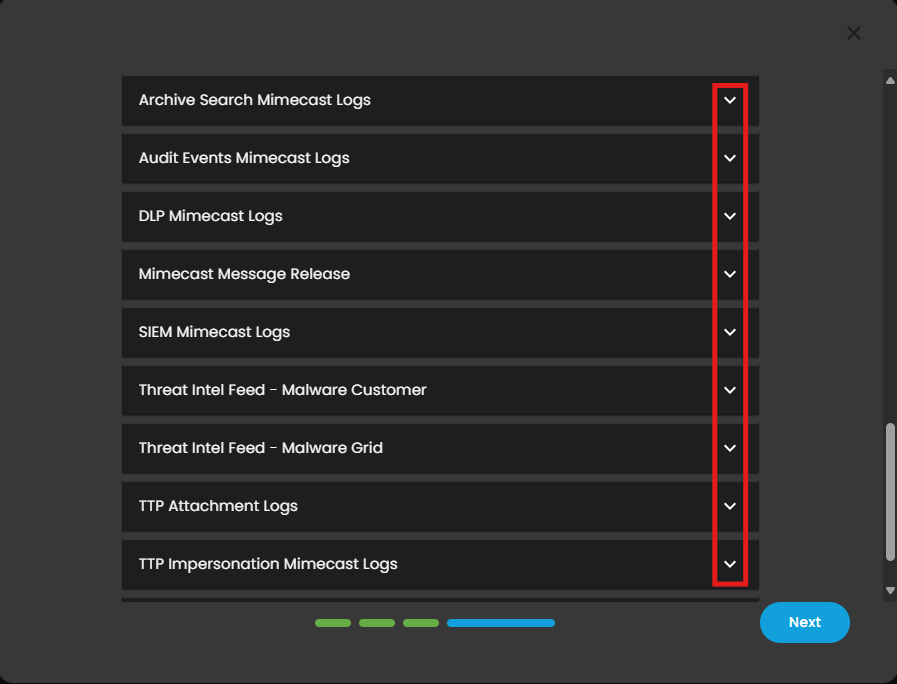
- Click the drop-down arrow on all the other fields.
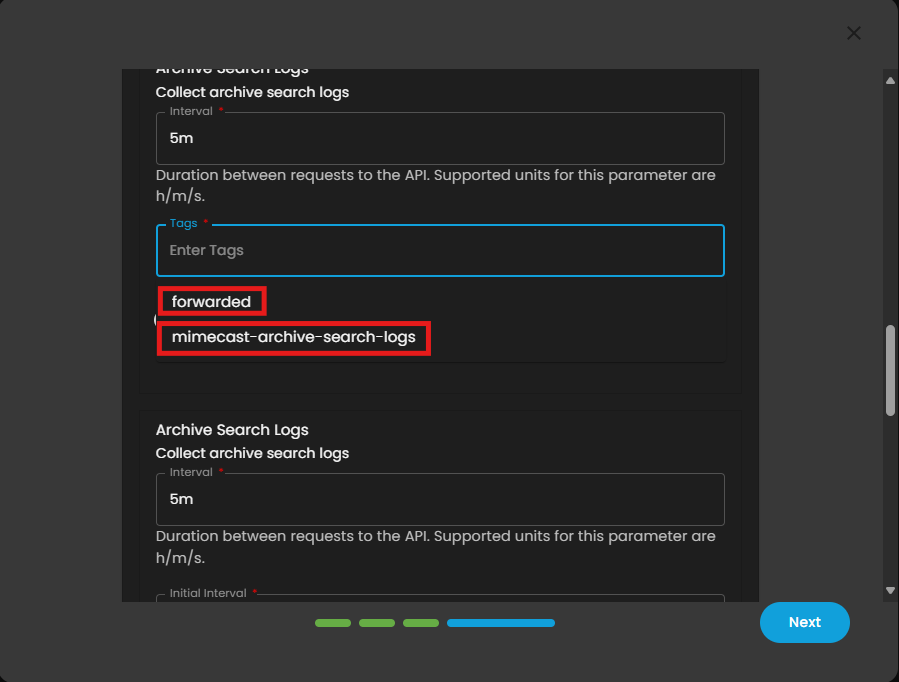
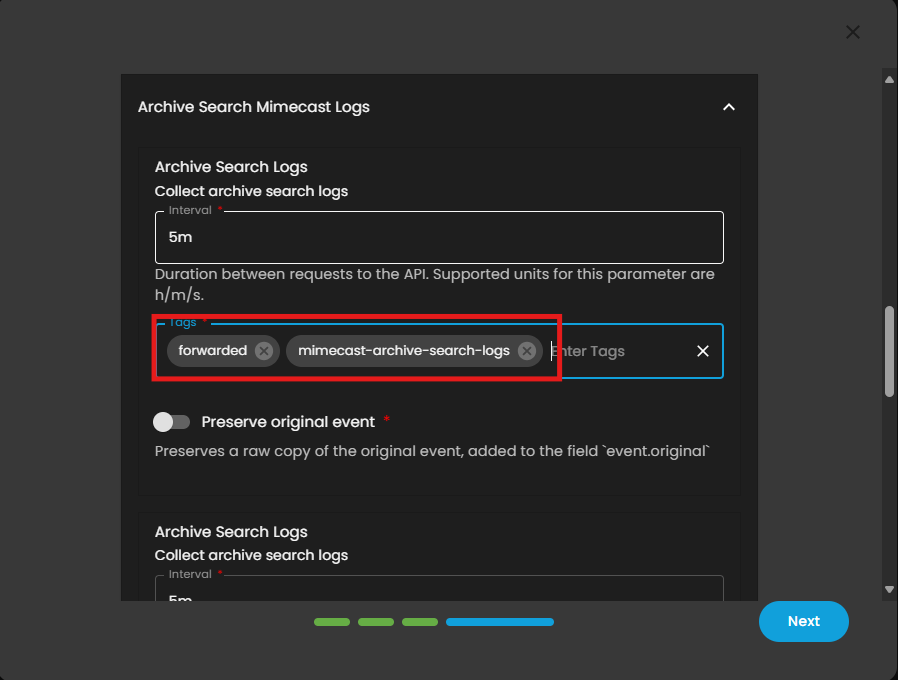
- Finally, click Next to install the log source integration.
8. Wait for the Successful window to display, this will confirm the successful integration.

Reference Links:
API & Integrations - Managing API 2.0 for Cloud Gateway
If you need further assistance, kindly contact our support at support@cytechint.com for prompt assistance and guidance.