
AQUILA - Mimecast API v2 Integration
Mimecast Integration Guide
Integrate Mimecast with your security platform via API to collect email threat data, archive logs, DLP events, and other security-related logs for centralized visibility and incident response.
API 2.0 is the current standard - It's been generally available for over a year and is what Mimecast recommends for new integrations
Credentials & API Access Setup (Mimecast)Mimecast API v2)
Before configuring the integration, prepare your API credentials from the Mimecast Admin Console.
StepsCreating an API 2.0 Application:
1.To Preparecreate Your Mimecastan API Credentials2.0 Application, follow the steps below:
Follow these steps in the Mimecast Admin Console to generate the required credentials.Log in to
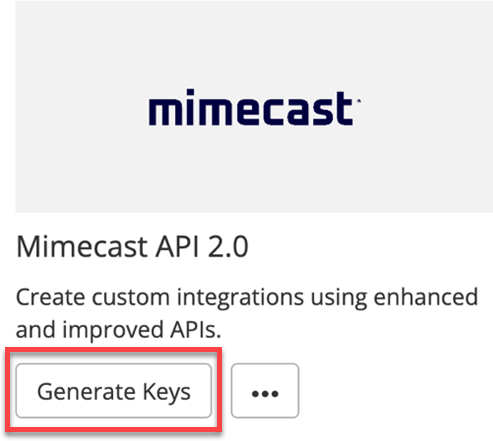
theMimecast Administration Console- Navigate to Integrations | API and Platform Integrations
- Locate the following Mimecast API 2.0 tile and click on Generate Keys.
-
After reading the Terms & Conditions, complete the I accept check box to enable the Next button to progress onto the next step.
-
GoCompleteto:theAdministrationApplication→DetailsAccount → API Applicationssection. - We highly recommend creating a dedicated custom role with
RegisteronlyNewthe permissions required for the Application to function. Provide a name and description (e.g., "Log Integration for Aquila")
minimum set of Products the App needs to access to function.SaveSelect theapplicationOnceShouldregistered,wenoteneedthetofollowingcontactcredentials:you- regarding
Application IDApplication KeyAccess KeySecret Key
Also, confirm yourMimecastthis APIBaseapplication,URLplease provide details for a Technical Point of Contact.https://au-api.mimecast.com(AU)
Click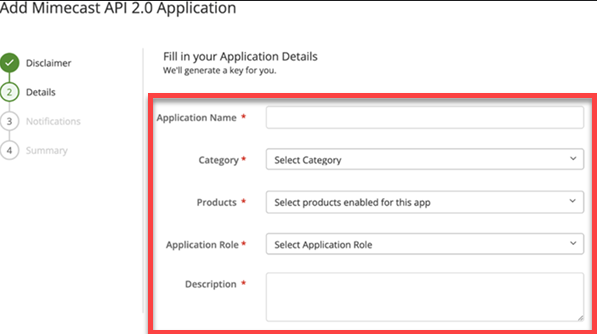
https://api.mimecast.com (US)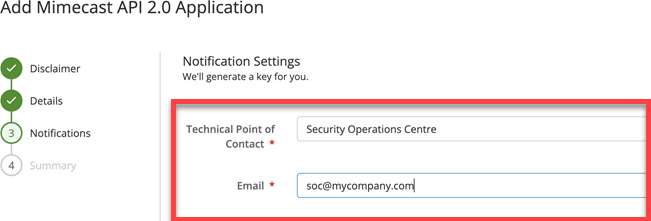
Note:MimecastSome log types (like DLP or Threat Intel) may requirerecommends aseparategroupAccessratherKeythandueantoindividualrate limits or limited scopes per API app.contact.
2.
RequiredFieldsthe Summary information for Integrationthe API application and click on Add if you are happy to proceed with creating the application.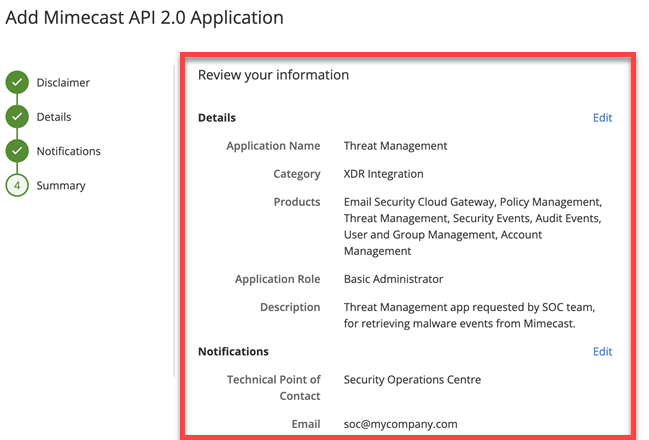
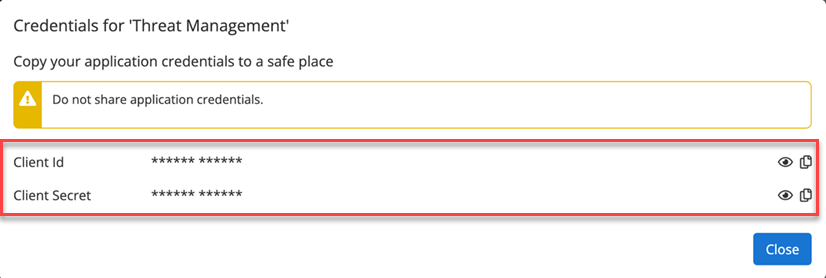
Once 8. The wizard completes and displays a pop-up window including your Client ID and Client Secret key data, where you can copy and save the credentials above gathered,for the following fields will be required during the integration:
URL:application.
Base URL (Mimecast API basev2)
To
3.gateway Accessoptions Keytailored Permissionsto &fulfill Scopeyour Behavior
In Mimecast,permission scopes are not manually assignedvia the UI. Instead, they areautomatically grantedbased on:Therolecompliance, andprivilegesof the Mimecast user account that created theAccess KeyThefeatures enabledin your Mimecast subscription (e.g., SIEM, DLP, Threat Intelligence)
residency
Note: Use aMimecast Administrator accountwhen generating the Access Key to ensure full access to all supporteddatastreams.
4. Additional Requirements for v2 API Endpoints (OAuth 2.0)
Some Mimecast log types may use v2 API endpoints, which require a different set of credentials using OAuth 2.0. Fom the same registered application, collect the following:requirements:
APIGlobalURL:URL:YourTheregion’s Mimecastglobal APIbaseURLURLapi.services.mimecast.com which serves traffic from the nearest instance ensuring reduced latency and enhanced performance.ClientUKID:Instance URL:FromFor compliance and data residency requirements, customers can choose to process traffic via theregisteredUKapplicationinstance using the regional URL: uk-api.services.mimecast.com. This ensures API traffic is only processed within the UK instance of the Apigee Gateway.ClientUSSecret:Instance URL:TiedSimilarly, customers with compliance or residency requirements in the US can use us-api.services.mimecast.com to process API traffic exclusively through theregisteredUSClientinstanceIDof the Apigee Gateway.
These are required for integrations that rely on Mimecast’s OAuth 2.0 authorization flow.
Permissions Reference (Mimecast API App)
Ensure the API Application and associated Access Key have the following scopes:
| UK Instance URL | US Instance URL | ||
|---|---|---|---|
|
uk-api.services.mimecast.com | us-api.services.mimecast.com | |
| failover |||
| |||
|
Aquila Integration Configuration
AQUILA – Mimecast Integration
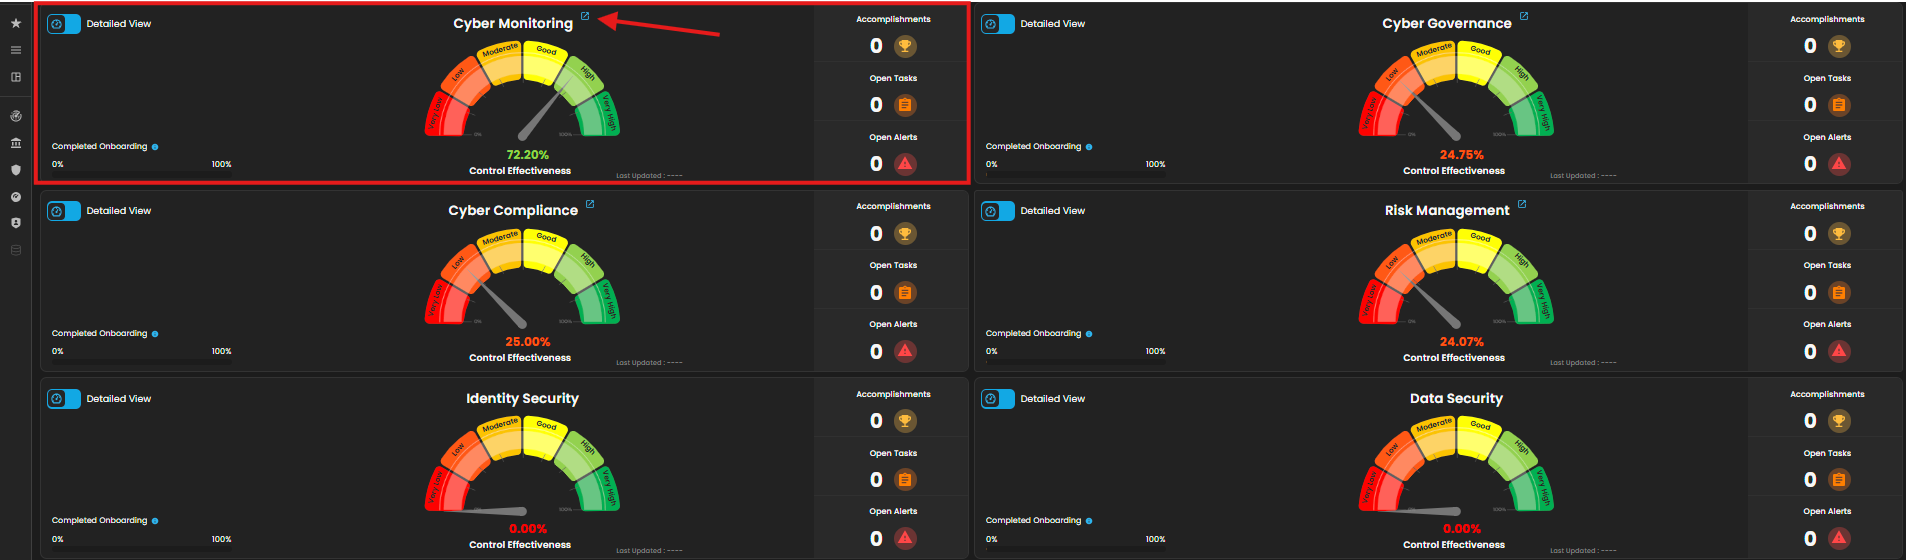
1. Log in to AQUILA click here - CyTech - AQUILA. Choose Cyber Monitoring and click the small arrow icon to redirect you to the Cyber Monitoring Dashboard.
2. In the dashboard, choose Cyber Incident Management (SIEM and XDR).


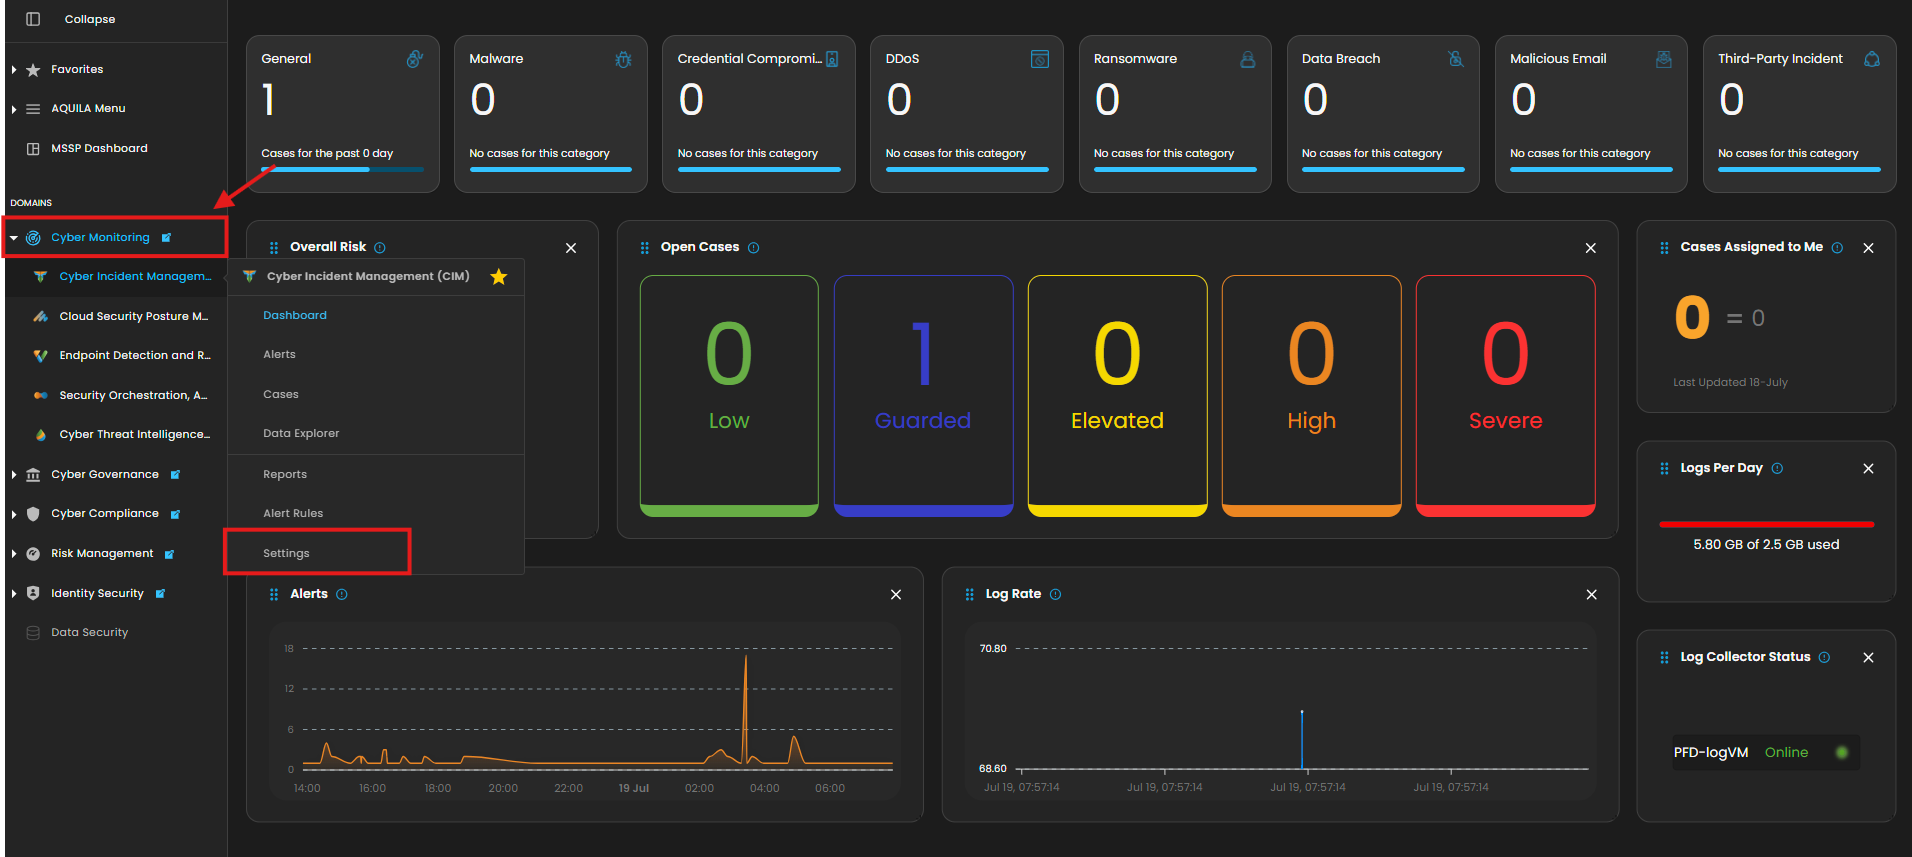
5. Click the "Settings and Navigate through Settings>Log Source>Search Bar (Search the Source to Add)>Add to Agent.
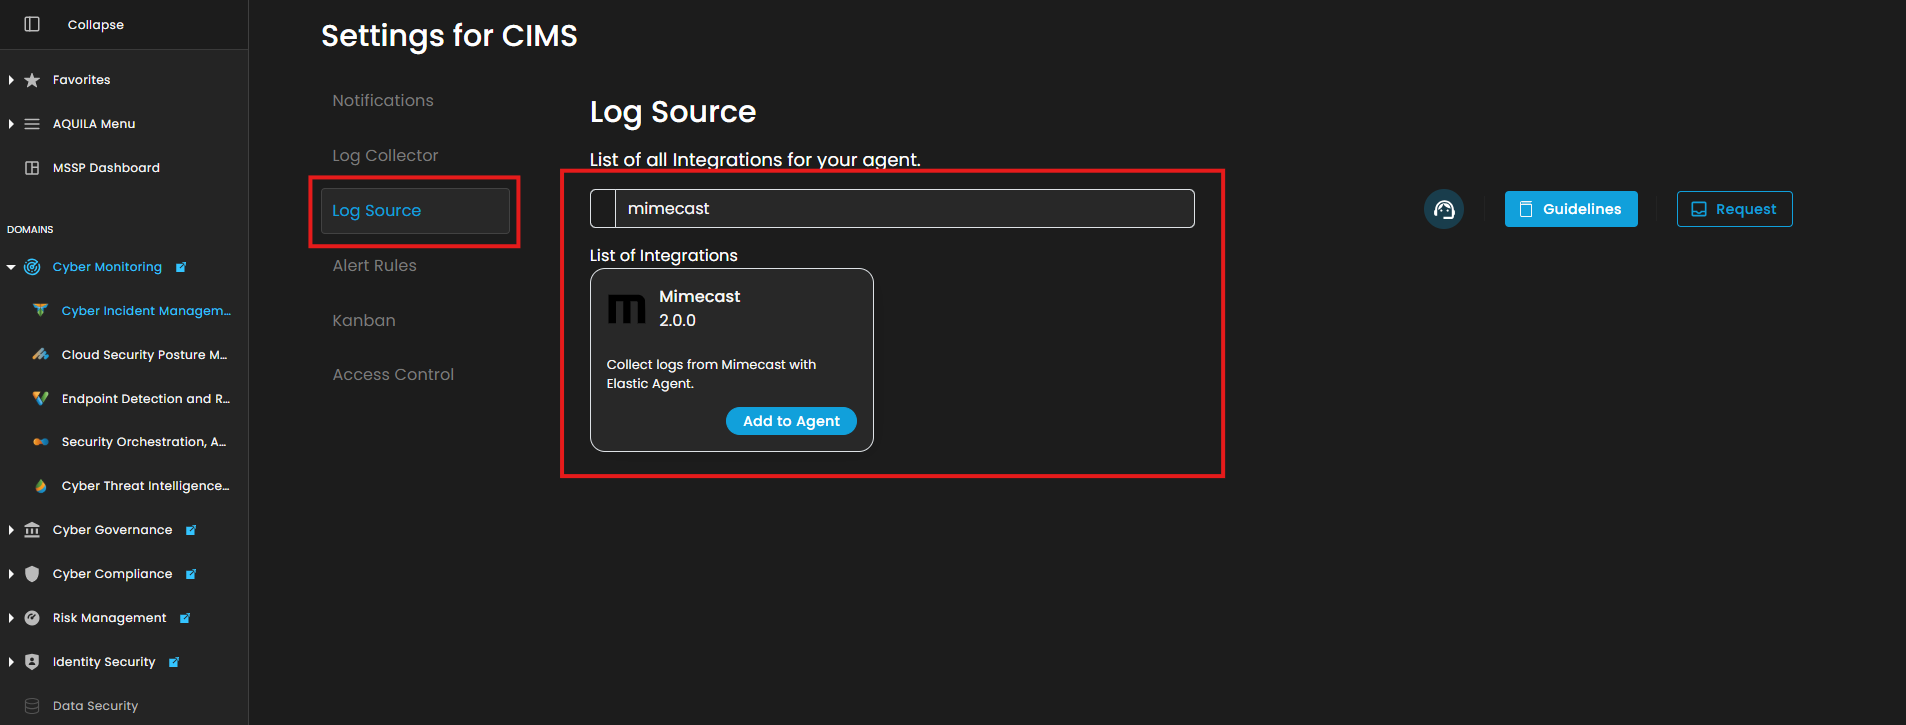
6. Choose your Log Collector. (If you not yet installed your Log Collector please refer to this link - Log Collector Installation.)

7. In the integration settings follow the instructions given below.
- Click the drop arrow to display the contents needed for the integration setup.
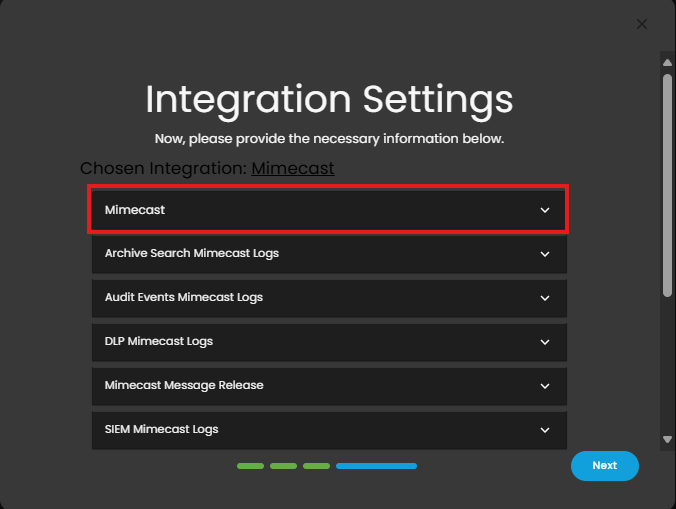
- Upon clicking the drop arrow, it will display two versions of Mimecast Integration, v1 API and v2 API Endpoints.
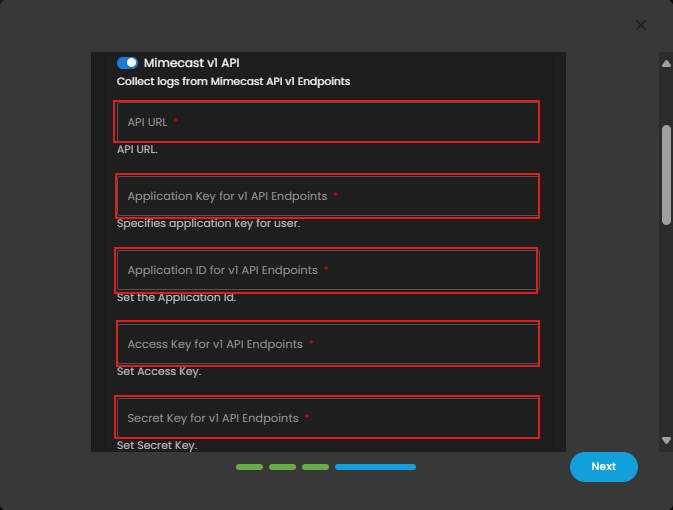
- This is for API v1 Endpoints. Input the required Fields: API URL (Mimecast API base URL), Application Key, Application ID, Access Key, and Secret Key.
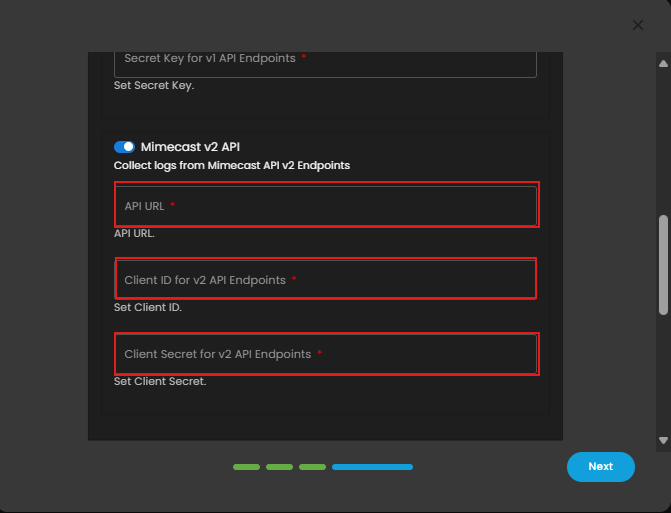
- This one is for API v2 Endpoints. Enter the required fields API URL (Mimecast API base URL), Client ID, and Client Secret.
- Finally, click Next to install the log source integration.
8. Wait for the Successful window to display, this will confirm the successful integration.

If you need further assistance, kindly contact our support at support@cytechint.com for prompt assistance and guidance.