
AQUILA - Setup Integration from Mimecast
Mimecast Integration Guide
Integrate Mimecast with your security platform via API to collect email threat data, archive logs, DLP events, and other security-related logs for centralized visibility and incident response.
Credentials & API Access Setup (Mimecast)
Before configuring the integration, prepare your API credentials from the Mimecast Admin Console.
Steps:
- Follow these steps in the Mimecast Admin Console to generate the required credentials.
-
Log in to the Mimecast Administration
Console.Console -
NavigateGototo:Administration → Account → API Applications. -
Click
“Register NewApplication”Applicationand -
Provide a name and
description.description (e.g., "Log Integration for Aquila") -
Save the application
provide -
- Once registered,
takenoteofthe followingcredentials:credentials:-
Application ID
-
Application Key
-
Access Key
-
Secret Key
-
- Also,
(region-specific).You may needconfirm your MimecastRegion-specificAPIAPIBase URL:
Examples:-
Example:https://api.mimecast.com(US) -
Checkhttps://au-api.mimecast.comwith your Mimecast representative for region-specific URLs.(AU)
-
1. Prepare Your Mimecast API Credentials
Note: Some log types (like DLP or Threat Intel) may require a separate
credentialsAccess Key due to ratelimits.limits or limited scopes per API app.
2. Required Fields for Integration
- Once the credentials above gathered, the following fields will be required during the integration:
- API URL: Your region’s Mimecast API base URL
- Application Key: From the registered application
- Application ID: From the registered application
- Access Key: From the account with log access
- Secret Key: Secret tied to the Access Key
3. Access Key Permissions & Scope Behavior
- In Mimecast, permission scopes are not manually assigned via the UI. Instead, they are automatically granted based on:
-
The role and privileges of the Mimecast user account that created the Access Key
-
The features enabled in your Mimecast subscription (e.g., SIEM, DLP, Threat Intelligence)
-
Note: Use a Mimecast Administrator account when generating the Access Key to ensure full access to all supported data streams.
4. Additional Requirements for v2 API Endpoints (OAuth 2.0)
Some Mimecast log types may use v2 API endpoints, which require a different set of credentials using OAuth 2.0. Fom the same registered application, collect the following:
- API URL: Your region’s Mimecast API base URL
- Client ID: From the registered application
- Client Secret: Tied to the registered Client ID
These are required for integrations that rely on Mimecast’s OAuth 2.0 authorization flow.
Permissions Reference (Mimecast API App)
Ensure the API Application and associated Access Key have the following scopes:
| Data Stream | Permission Scope |
|---|---|
| Archive / Audit Logs | auditevents:read |
| DLP & SIEM Logs | dlplogs:read, siemlogs:read |
| Threat Intel Feeds | ti_logs:read |
| TTP Logs | ttp_logs:read |
Integration Configuration (Mimecast)
Aquila Integration Configuration
(Mimecast)AQUILA – Mimecast Integration
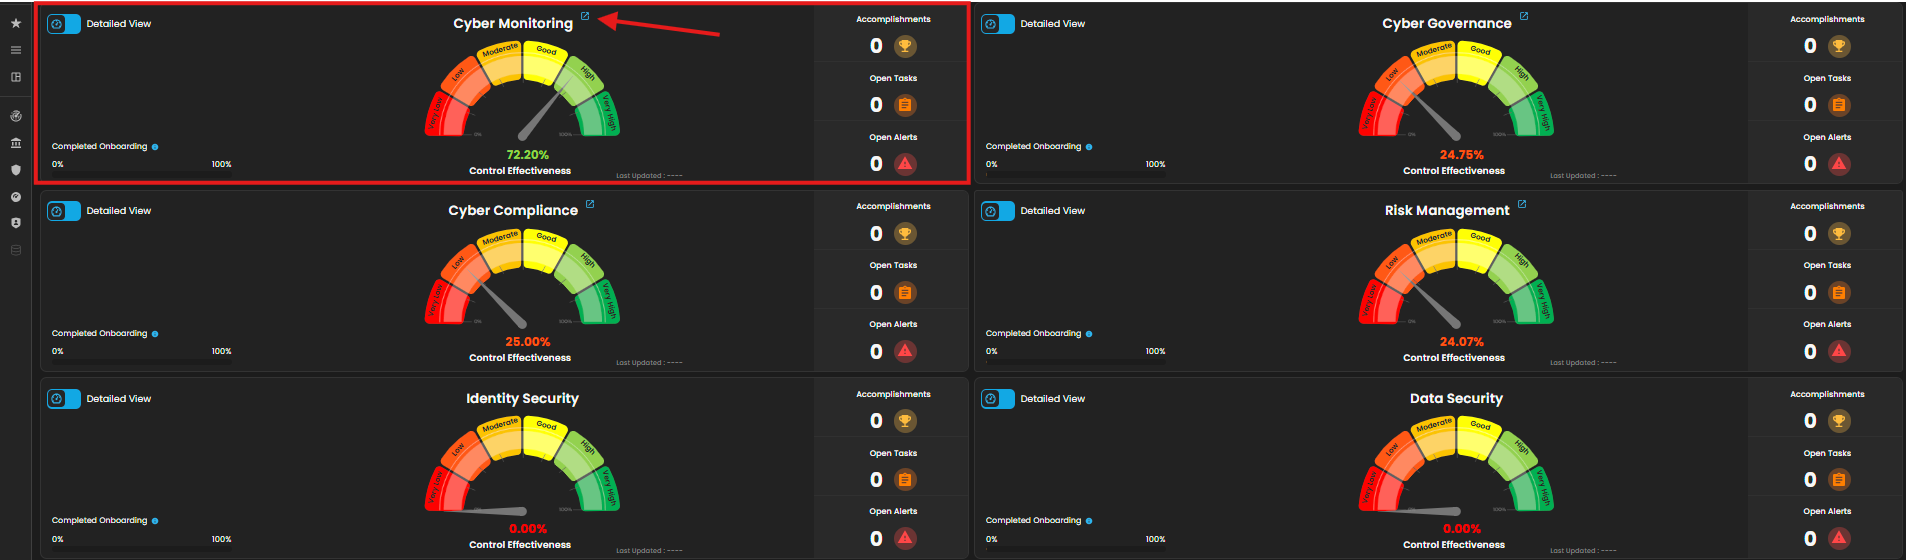
1. Log in to AQUILA click here - CyTech - AQUILA. Choose Cyber Monitoring and click the small arrow icon to redirect you to the Cyber Monitoring Dashboard.
2. In the dashboard, choose Cyber Incident Management (incomplete)SIEM and XDR).


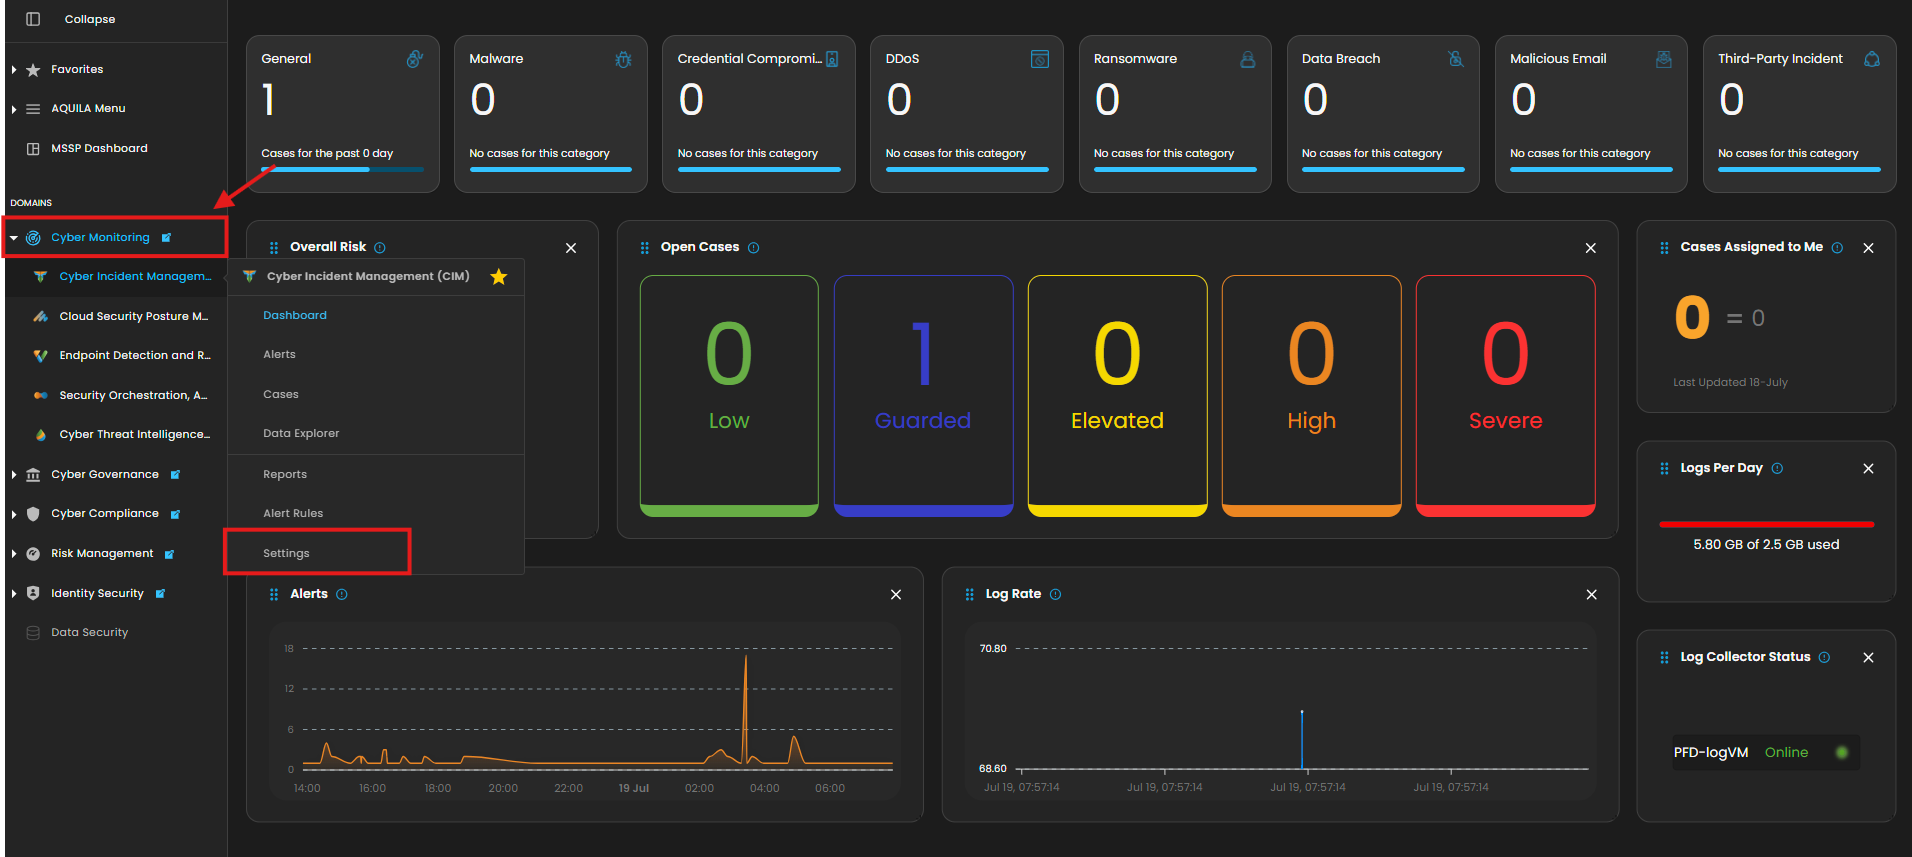
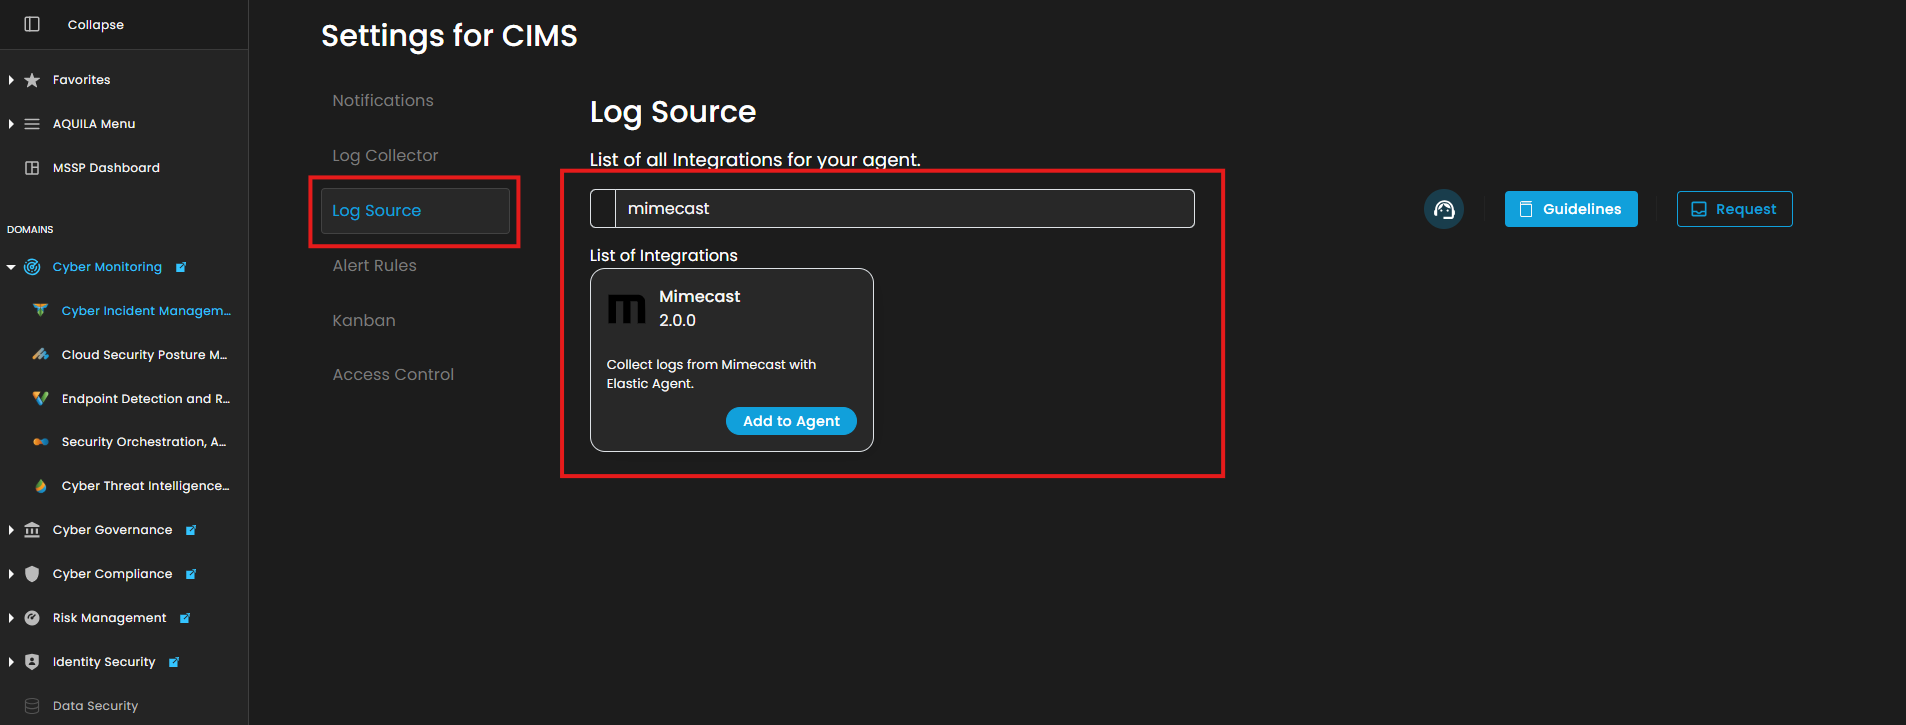
5. Click the "Settings and Navigate through Settings>Log Source>Search Bar (Search the Source to Add)>Add to Agent.
6. Choose your Log Collector. (If you not yet installed your Log Collector please refer to this link - Log Collector Installation.)

7. In the integration settings follow the instructions given below.
- Click the drop arrow to display the contents needed for the integration setup.
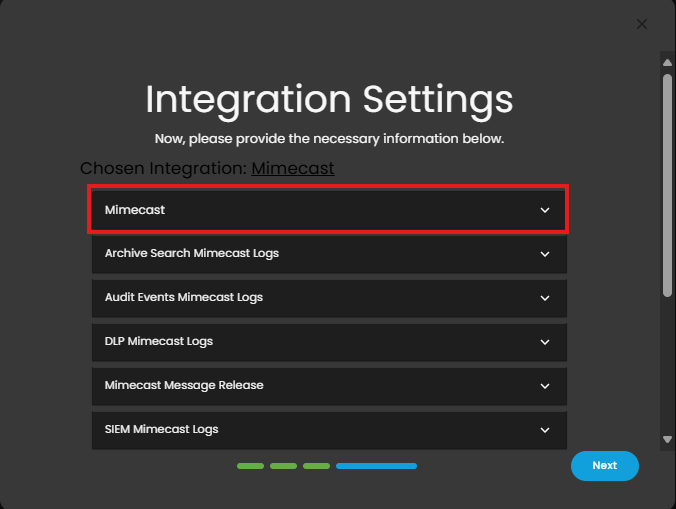
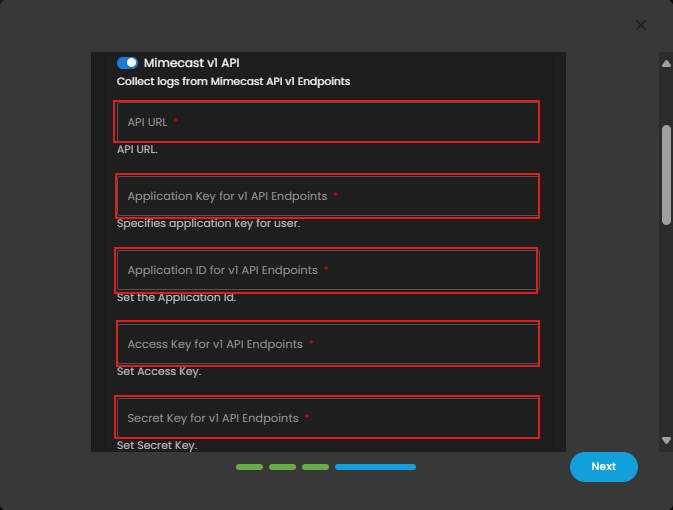
- Upon clicking the drop arrow, it will display two versions of Mimecast Integration, v1 API and v2 API Endpoints.
- This is for API v1 Endpoints. Input the required Fields: API URL (Mimecast API base URL), Application Key, Application ID, Access Key, and Secret Key.
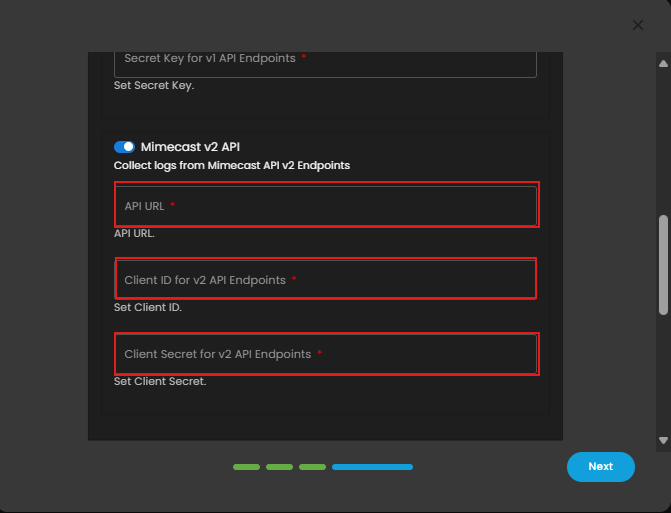
- This one is for API v2 Endpoints. Enter the required fields API URL (Mimecast API base URL), Client ID, and Client Secret.
- Finally, click Next to install the log source integration.
8. Wait for the Successful window to display, this will confirm the successful integration.

If you need further assistance, kindly contact our support at support@cytechint.com for prompt assistance and guidance.