Whitelist in Proofpoint
If you're using Proofpoint Essential's spam filtering or Proofpoint Enterprise's Allowlist, you can whitelist CyTech to allow our simulated phishing test emails and training notifications through to your end users.
The instructions below are for third-party software. If you run into issues whitelisting CyTech in Proofpoint, we recommend reaching out to Proofpoint for specific instructions. You can also contact our support team whenever you need assistance.
Whitelisting in Proofpoint Essentials
When you're ready to whitelist in Proofpoint Essentials, follow the below instructions. These instructions were gathered from Proofpoint's Safelisting Addresses article.
If you have issues with attachment-related emails, see Proofpoint's article on Blocks by Default.
Whitelisting in Proofpoint Enterprise
To whitelist in Proofpoint Enterprise, follow the below instructions. If you experience any issues with these steps, please contact our support team for assistance.
To avoid potential issues with Proofpoint’s Targeted Attack Protection, we suggest that you add CyTech’s IP addresses to Proofpoint’s URL Defense. To add CyTech's IP addresses to Proofpoint's URL Defense, follow the steps below:
How to Prevent Proofpoint from Bouncing Emails
If some of your phishing security test (PST) emails are bouncing with an error message of "Sender address rejected: Domain not found (in reply to RCPT TO command)",follow the instructions below to resolve this issue.
- From your CyTech console, click your email address in the top right corner and select Account Settings.
- Navigate to the Phishing Settings section.
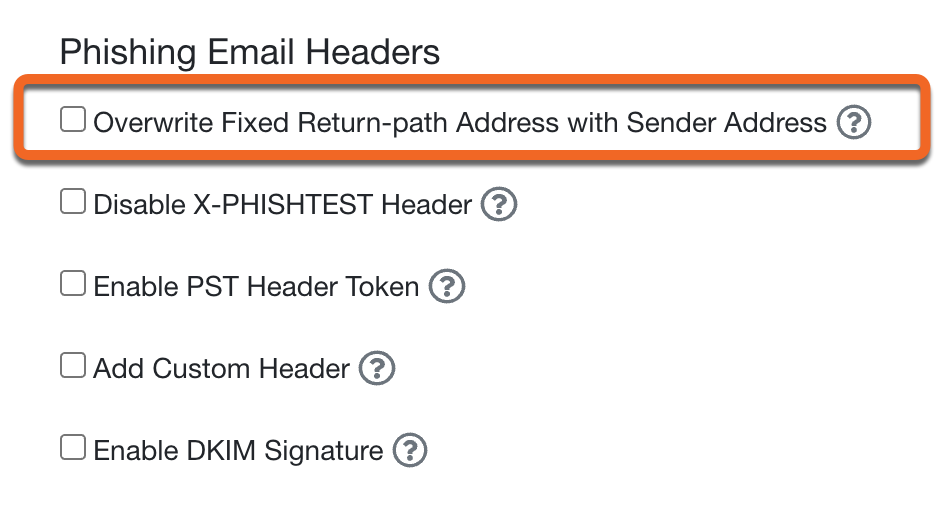
- Check that the Overwrite Fixed Return-path Address with Sender Address option is not enabled (see below).

- Be sure to save this change by clicking the Save Changes button at the bottom of the page.
- To confirm this change will prevent Proofpoint from causing your PST emails to bounce, we recommend you test this change. You can do this by sending a test campaign to yourself or a limited number of users before sending it to a larger group.
What to Do If Your Emails are Going to Spam
If your emails are being sent to spam or are being quarantined, you'll need to add CyTech to the Organizational Safe List in Proofpoint.
Follow the instructions below to add CyTech's hostnames or IP addresses to the Organizational Safe List:
- From your Proofpoint admin center, navigate to Email Protection > Spam Detection > Organizational Safe List.
- Add either our hostnames or IP addresses.
Note: Contact CyTech for a list of IPs.
If you need further assistance, kindly contact our support at support@cytechint.com for prompt assistance and guidance.
